
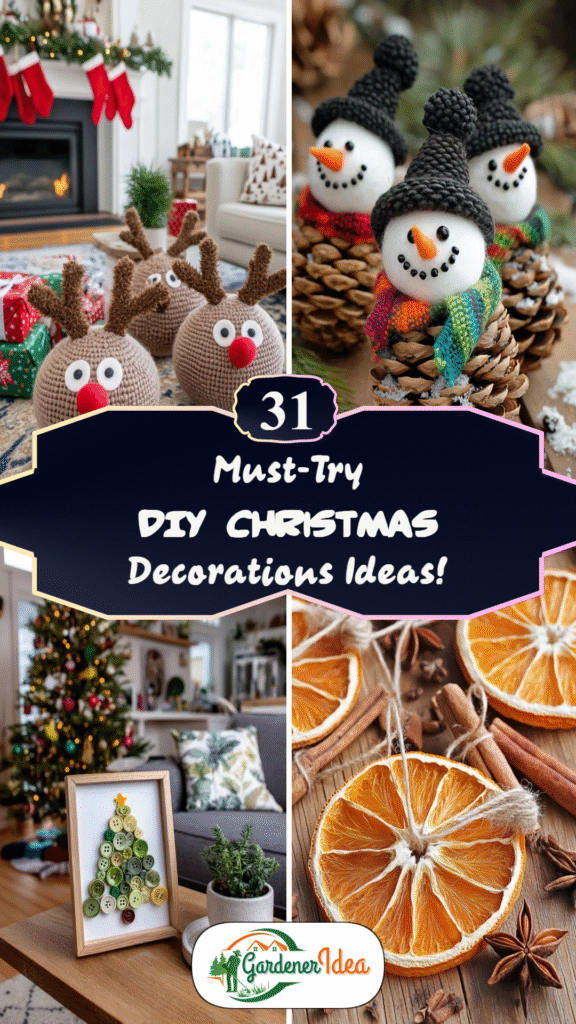
Get ready for a festive season packed with 31 handmade Christmas decor projects. Each idea is built to spark creativity and bring fresh energy to your home. Bookmark this list now so you can come back to it anytime you need a project.
A store-bought ornament never carries the same story as one you built with your own hands. Making decorations together turns a quiet evening into a shared memory.
The process of building your own Christmas decorations can bring as much joy as hanging the finished piece. Cutting, painting, and gluing becomes part of the celebration itself.
Whether you’re covered in glitter with friends or working solo with music playing, crafting holiday decor turns into a memorable ritual. These easy projects need only basic supplies to produce something worth displaying. Grab your materials and let’s get started.
1. Peppermint Swirl Cardboard Door Hanger

Cardboard isn’t just for shipping boxes. Cut a round shape from a sturdy piece and you have the base for an oversized peppermint swirl door hanger that draws attention from across the yard.
Paint red and white swirl patterns across the circle, then seal it with a glossy topcoat so the colors pop. Finish by tying on a striped ribbon for hanging. The whole project costs less than a coffee shop drink.
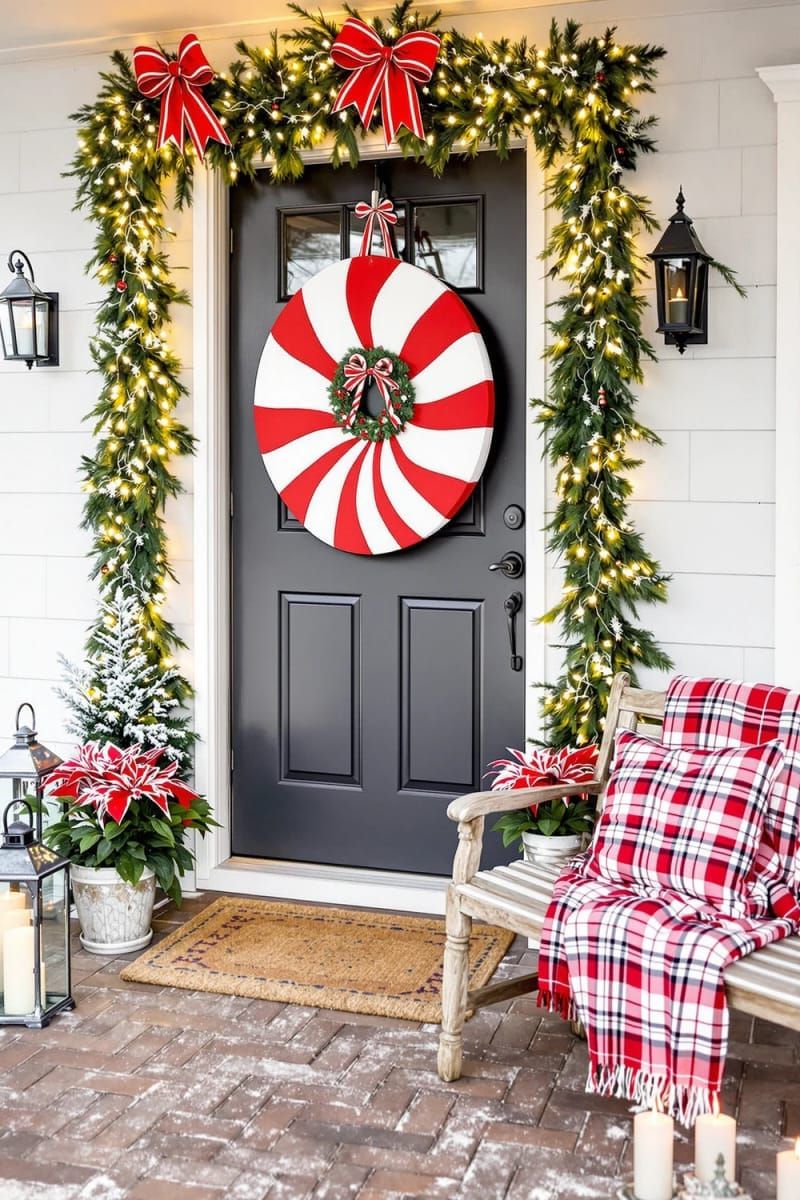
Kids love grabbing a brush and adding their own swirls, and the results usually turn out better than expected. Keep in mind cardboard doesn’t hold up in rain or snow, so reserve this hanger for an indoor door or a covered porch.
Big impact doesn’t require a big budget or advanced skills here. Simple materials like paint and cardboard often produce the decorations people remember most.
2. Geometric Paper Ornament Wall Tree
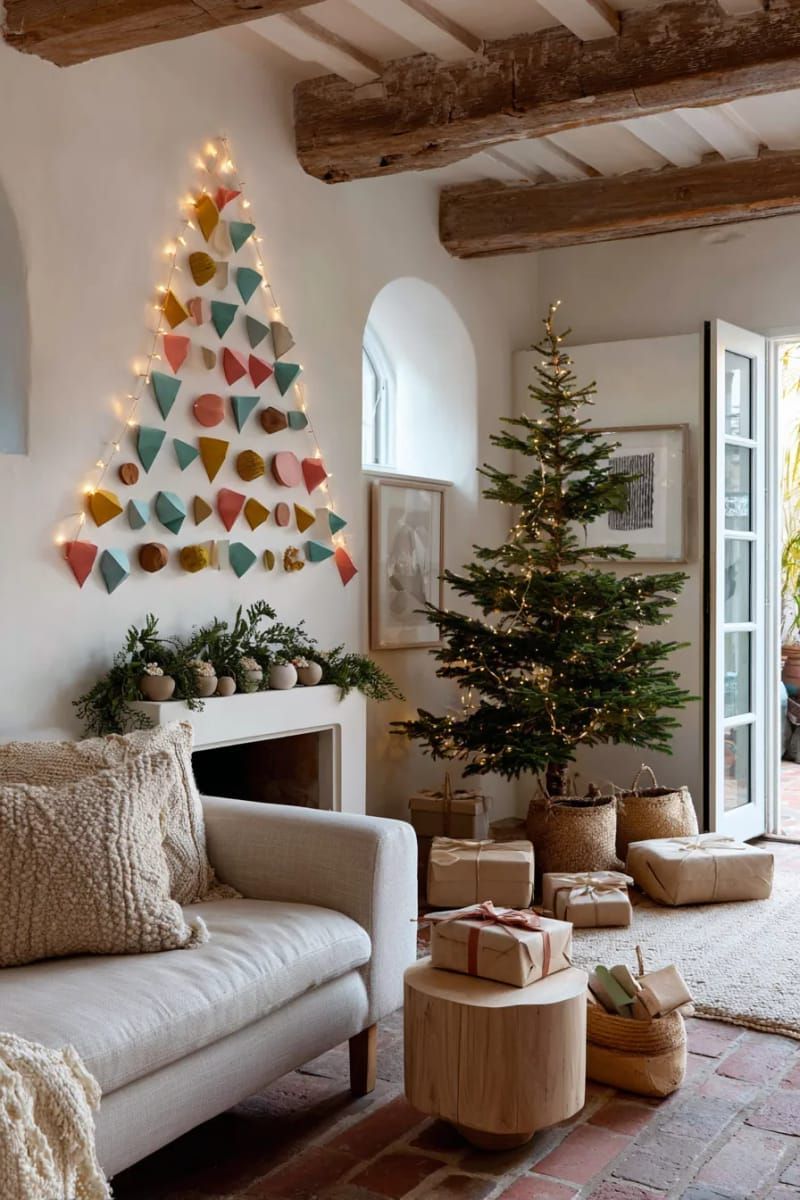
A wall-mounted tree built from string lights and paper cutouts proves that small spaces can still hold big holiday style. This project skips the need for floor space entirely and costs very little to pull off.
Cut geometric shapes from colored paper and tape them directly onto the wall in a tree formation. Weave soft fairy lights through the layout to give it a warm glow once evening comes.
Try triangles, circles, and hexagons in bold colors for extra visual punch. Most people can finish the whole layout in under an hour, start to finish.
One catch: paper cutouts and humidity don’t mix well, so pieces may curl or loosen over time in damp rooms. Swapping out a few shapes takes minutes, so refreshing the display partway through the season is simple.
3. Floating Paper Snowflake Cloud Display
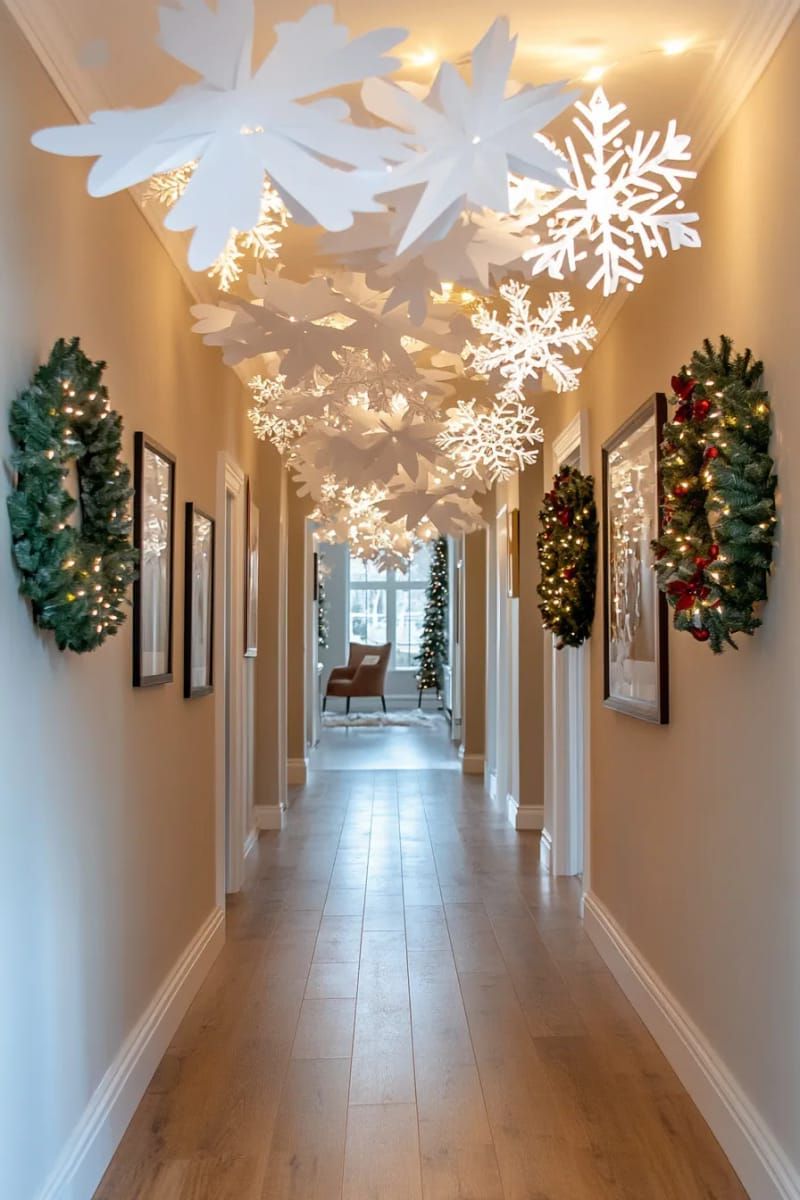
String white paper snowflakes at varying heights using thin, clear fishing line or thread. The staggered heights create the illusion of snowflakes drifting mid-air as people walk beneath them.
The supply list is short: tape, string, and scissors. A few uneven, lopsided cuts only add to the handmade charm.
This display delivers a big visual impact for very little money. Skip hanging it near open windows, ceiling fans, or curious pets, since both drafts and paws can send the whole cloud crashing down.
For the best effect, hang the snowflakes high on the ceiling, away from heating vents and out of reach of small children who might tug on the strings.
4. Beaded Triangle Tree Garland
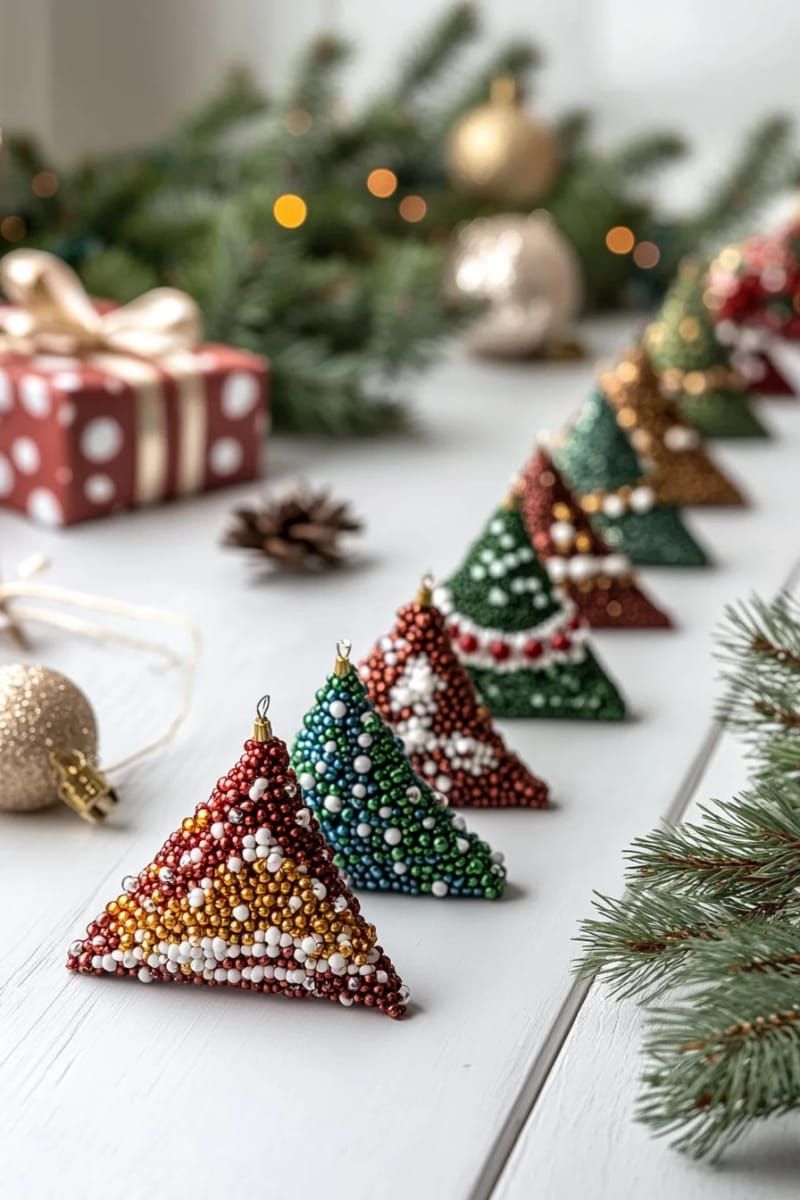
Small triangle-shaped trees made from colorful beads and sturdy wire bring a bright, festive look to any room. The project needs just three things: beads, wire, and an afternoon of free time.
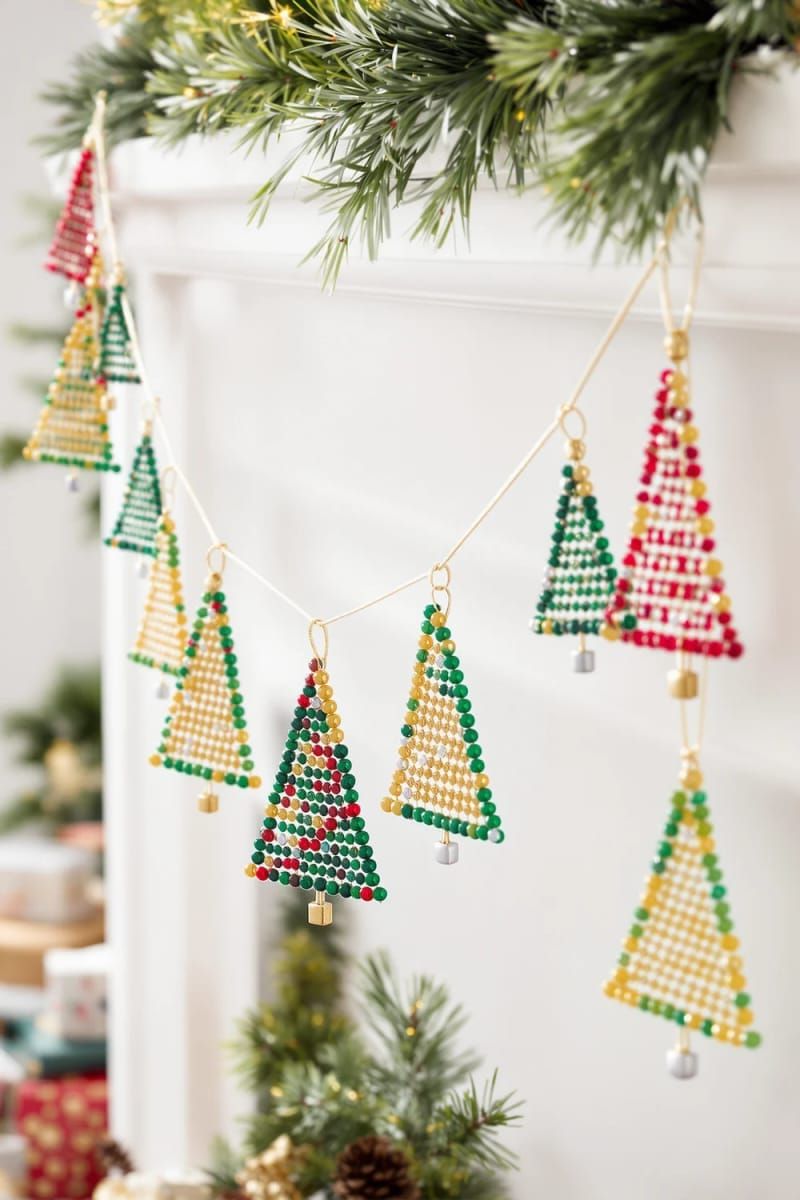
One sitting is usually enough to string together a whole set of mini trees. Once strung into a garland and hung across a wall, they turn a plain space into a holiday-ready backdrop.
Mixing bead sizes and finishes adds depth to the design. Combine wooden, glass, and metallic beads in the same strand for contrast, or stick to one color family for a cleaner look.

Small beads have a habit of rolling off the table and disappearing into carpet fibers. Set a shallow tray or bowl nearby to catch stray beads before they scatter across the floor.
5. Rustic Eucalyptus and Wooden Bead Wreaths
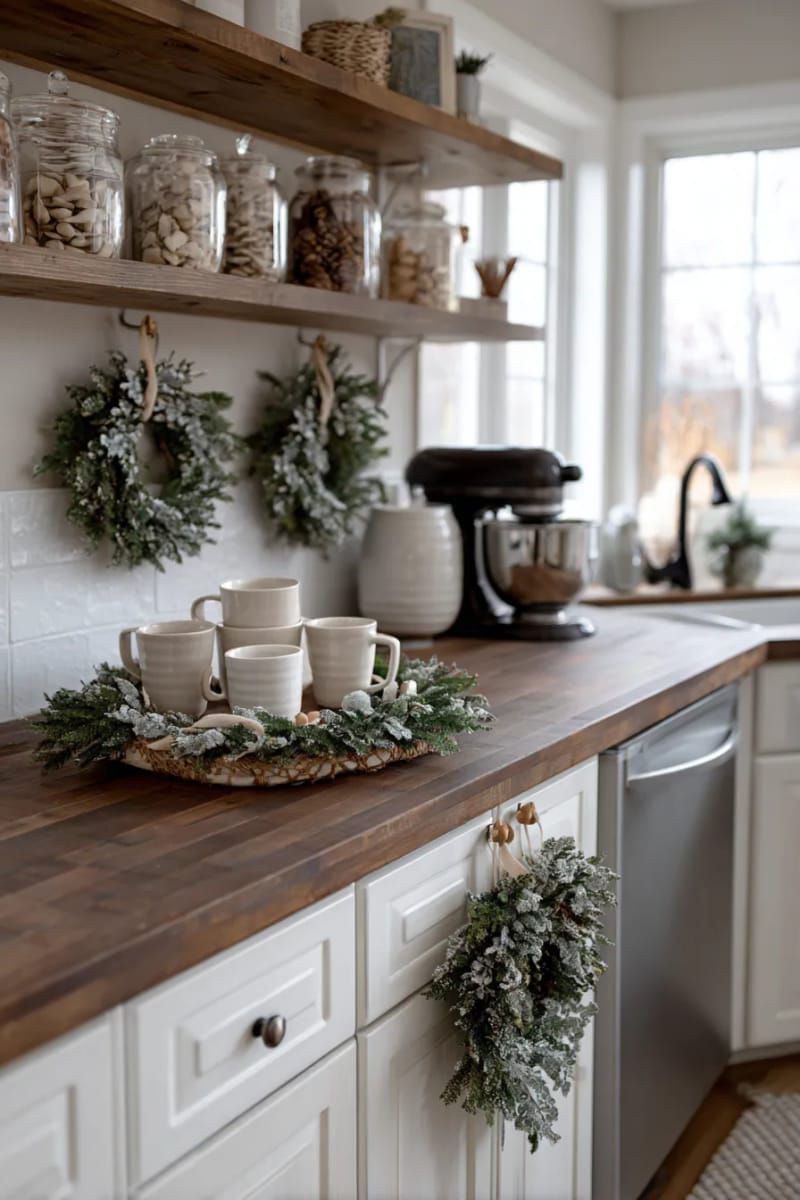
These mini wreaths pair fresh eucalyptus with wooden beads for a natural, earthy look that fits farmhouse and rustic holiday themes. Wrap floral wire with eucalyptus stems, then thread on a handful of beads to break up the greenery.

Tie one onto a wrapped gift or hang a few together as a small accent piece. Eucalyptus also carries a light, fresh scent that fades naturally over a few weeks without overwhelming a room.

The build is straightforward and inexpensive: floral wire, a few eucalyptus stems, and a small stash of wooden beads. Slide the beads onto the wire first, shape the wire into a circle, then tuck the eucalyptus leaves in around it.
A handful of natural materials can outshine a shelf full of store-bought wreaths. Skip the glitter and let the wood and greenery do the talking.
6. Painted Santa Face River Rocks
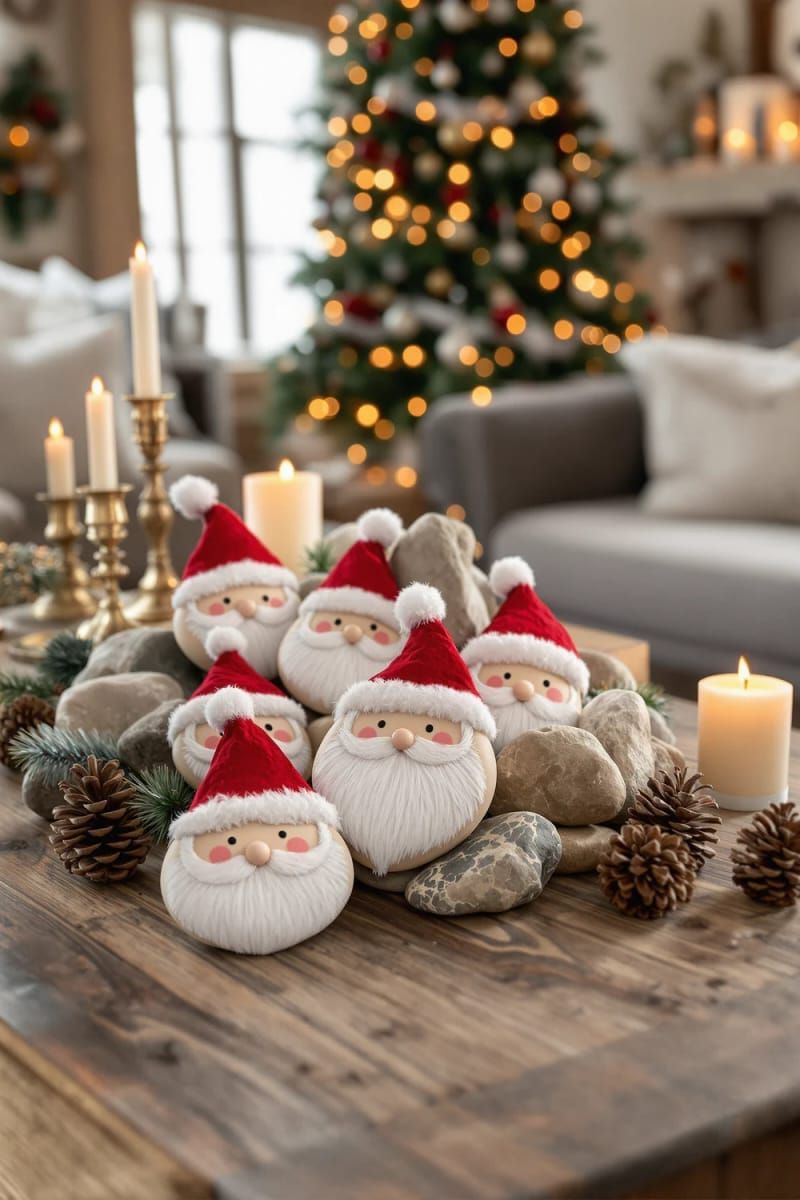
Smooth river rocks painted with Santa faces make a charming addition to a mantel or shelf. No two turn out exactly alike, since every brushstroke gives each rock its own personality.
Gather a few paint colors, a couple of small brushes, and some free time. This is an easy activity to hand kids and adults alike, since there’s no wrong way to paint a beard.
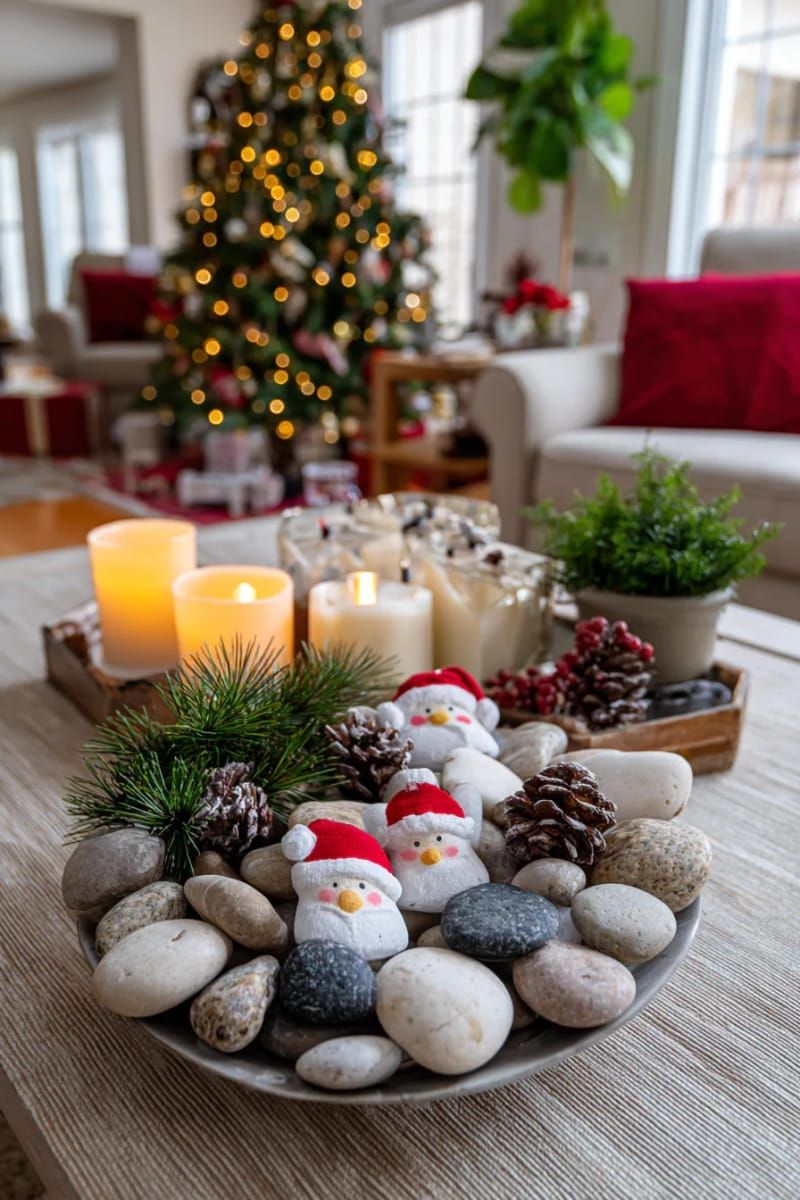
Wet paint on a smooth rock surface can get slippery fast, so expect a stray smudge or two. Rocks can also slip out of small hands mid-project, so work over a table with paper towels handy.
Uneven faces and crooked beards are part of the charm here, not a flaw to fix. Line up your finished Santa rocks along a mantel or windowsill for a display full of personality.
7. Felt Gingerbread Man Candy Cane Garland

A garland strung with felt gingerbread men brings instant warmth to a mantel or doorway. Brown felt, scissors, and thread are the only supplies needed, with no glue gun or sewing machine required.
Tuck in small striped candy cane shapes between each gingerbread figure for extra detail. This is an easy one to hand off to kids, and a slightly crooked shape only adds character to the finished garland.
Stringing this garland across a mantle or window brings joy right away. The felt shapes stay nice for a long time, unlike the plastic ones you buy in stores.
But remember, it’s okay if things get messy. The hot glue can be tricky, and some candy canes might not last until New Year’s. What matters most are the fun times we share and those silly little mistakes.
8. Popsicle Stick 3D Treetop Star

Have you ever thought about making a special star for the top of your tree? With some popsicle sticks, glue, and a little bit of glitter, you can create a shining 3D star. It’s fun, simple, and surprisingly strong.
Kids can join the fun, but you might find that the grown-ups want to craft as well.

You can make a shiny star with just a few simple things. Use some sticks and glue to make a cool shape, then add glitter for sparkle. Just remember to let it dry overnight—glitter tends to end up all over, though!
But that’s what makes it exciting; your living room will shine bright for days.
9. Dried Orange, Cinnamon and Anise Ornaments

Drying sliced oranges turns them into cheerful decorations that smell wonderful. You can hang them with cinnamon sticks and star anise, making a lovely sight that feels much nicer than anything made of plastic.
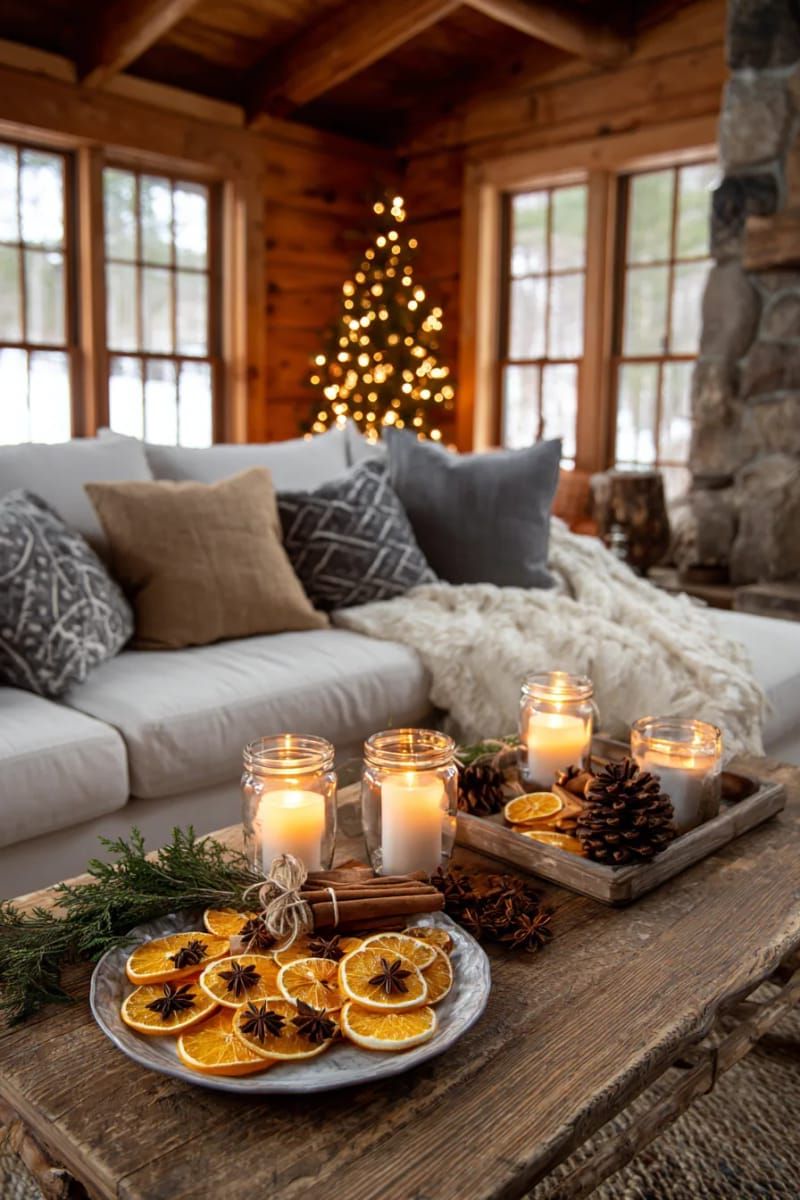
The lovely smell stays in the air, bringing a cozy holiday feeling to your home without any fake sprays or candles.

Making these is super easy: just cut the oranges into thin slices, bake them at a low temperature, and let the kids help put everything together. In the end, you have ornaments that don’t cost much and can go back to the earth when you’re done with them.
One thing to remember: if it gets too humid, they can become sticky. It’s best to keep them away from kitchens or bathrooms where there’s a lot of steam.
10. Yarn Reindeer Faces with Felt Noses
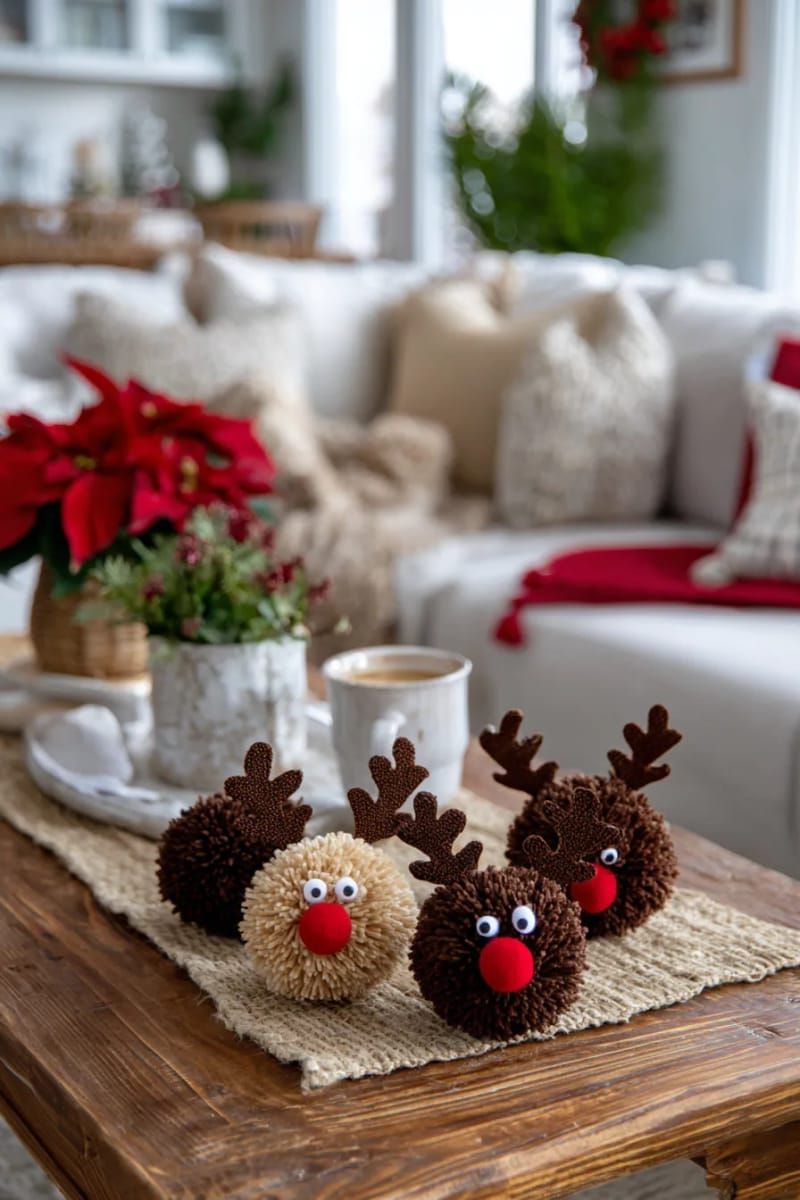
With some brown yarn and a sprinkle of creativity, you can make a cute reindeer face from a simple pom-pom. All you need are a fork, some scissors, and a little glue to bring it to life.
Snip the yarn and wrap it around your fingers, then tie it up tight and watch it turn into a soft, fluffy ball. Children enjoy helping, and any little mistakes just make it even more special.
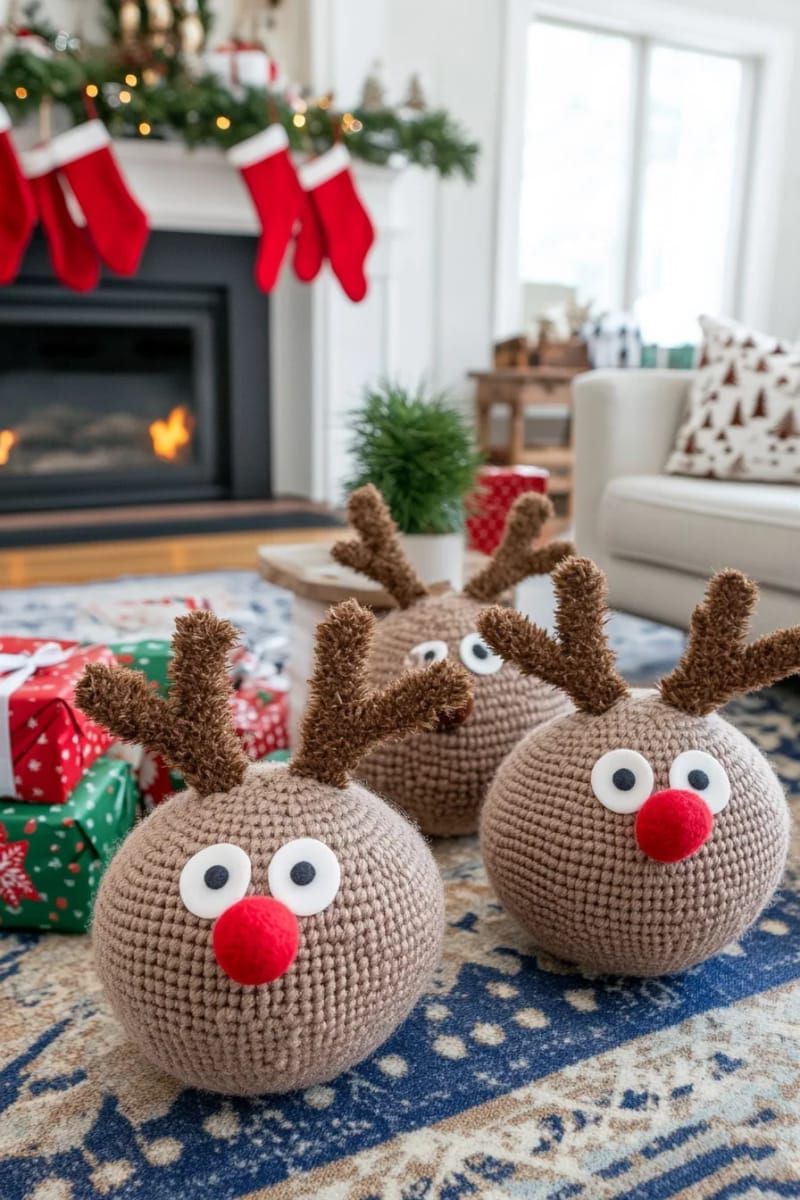
Stick on some googly eyes and a red felt nose to make it look like Rudolph. Then, add pipe cleaner antlers, and you’ve created a fun decoration that’s super cheap but brings lots of joy.
These are great for hanging on trees or adding to presents. They’re not meant to be perfect—it’s the funny shapes that make each reindeer special.
11. Hanging Elf Legs for Doorway Corners

Hanging elf legs from the corners of doors makes everyone laugh and feel happy when they arrive. Your friends will grin even before they knock.
All you need are colorful socks, some fluffy stuff inside, and a little bit of imagination. Why go for boring wreaths when you can hang funny legs that make everyone smile?
Some people might think this idea is a bit silly, but that’s part of why it’s so great. If you’re worried about hurting your doors, just use removable hooks or command strips.
Here’s a fun idea: change up the colors or add some bells for a little extra fun. This easy project will definitely get people talking and takes no time to put together.
12. Wall-Mounted Gift Box Display with Bows
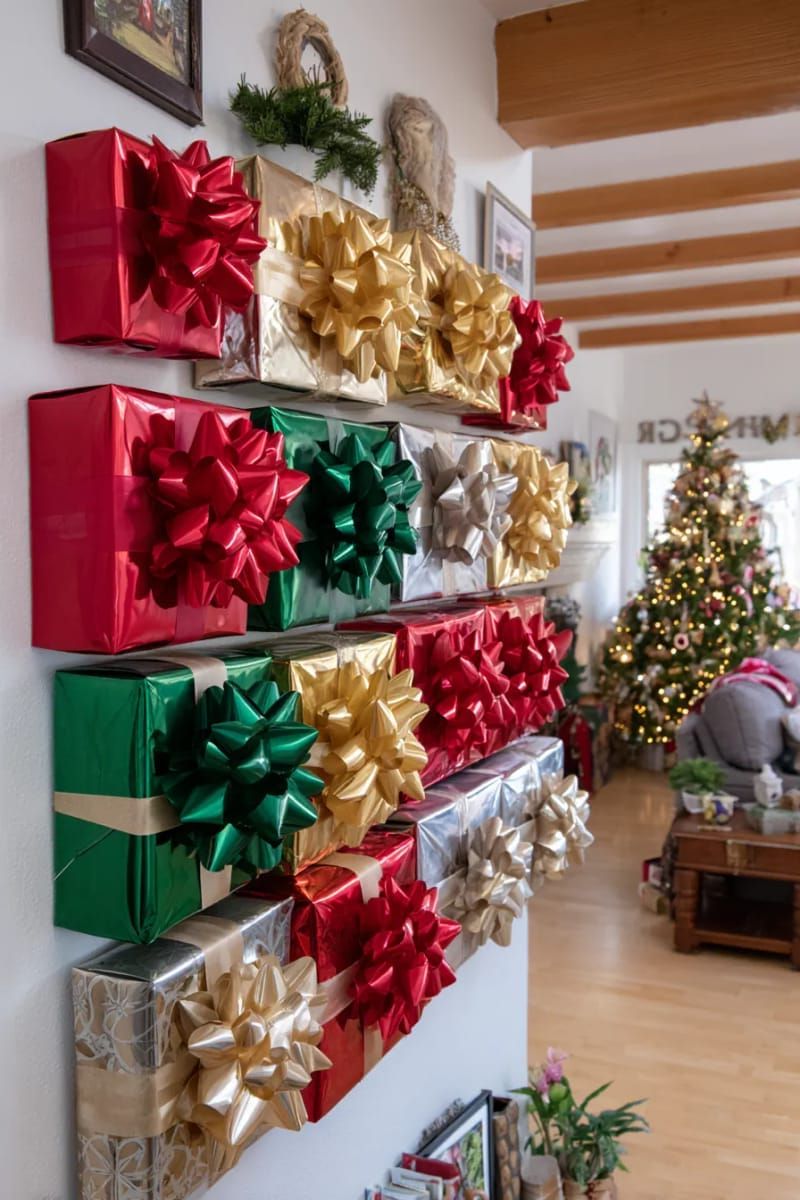
Making a wall of gift boxes with big bows is an easy way to add some holiday happiness. Take some empty boxes, cover them in colorful paper, and stick on big, fun bows.
You can place the boxes in a grid or pile them together to make a fun display. This way, a boring wall becomes a bright and cheerful spot for everyone to enjoy.
It might seem like a big task, but this project needs more tape and patience than you think. If the boxes aren’t stuck down tightly, they can slip or droop, so make sure to use strong tape to keep everything in place.
Using different sizes of boxes makes things look more exciting. You can ask your family to join in; it’s a fun way to get everyone ready for the holidays together.
13. Greenery-Wrapped Bow for Stairs and Doors
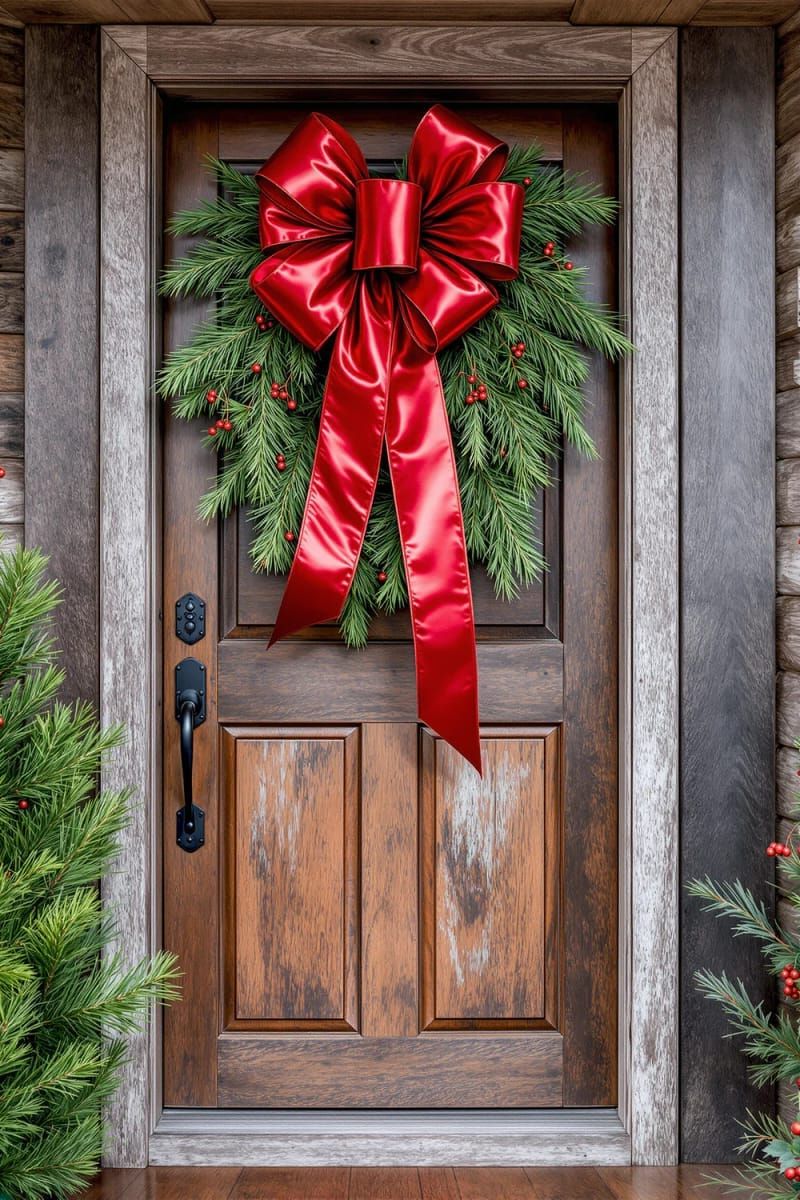
Big ribbon bows with some fake green leaves make stair railings and front doors look really nice. They seem fancy, but you can make them easily with wide ribbon, a little bit of fake pine, and some wire.
Use bright colors to catch the eye, or classic red for a warm feel. Make sure they’re tied on tight—no one wants a bow that escapes!

These decorations really stand out, but too many can make a place feel cramped. It’s better to pick one or two special spots for them. You can also add pinecones or tiny lights to make everything shine.
With just a bit of work, you can create a cheerful look that makes your friends and neighbors smile.
14. Faux Snow Ornaments with Mini Pinecones
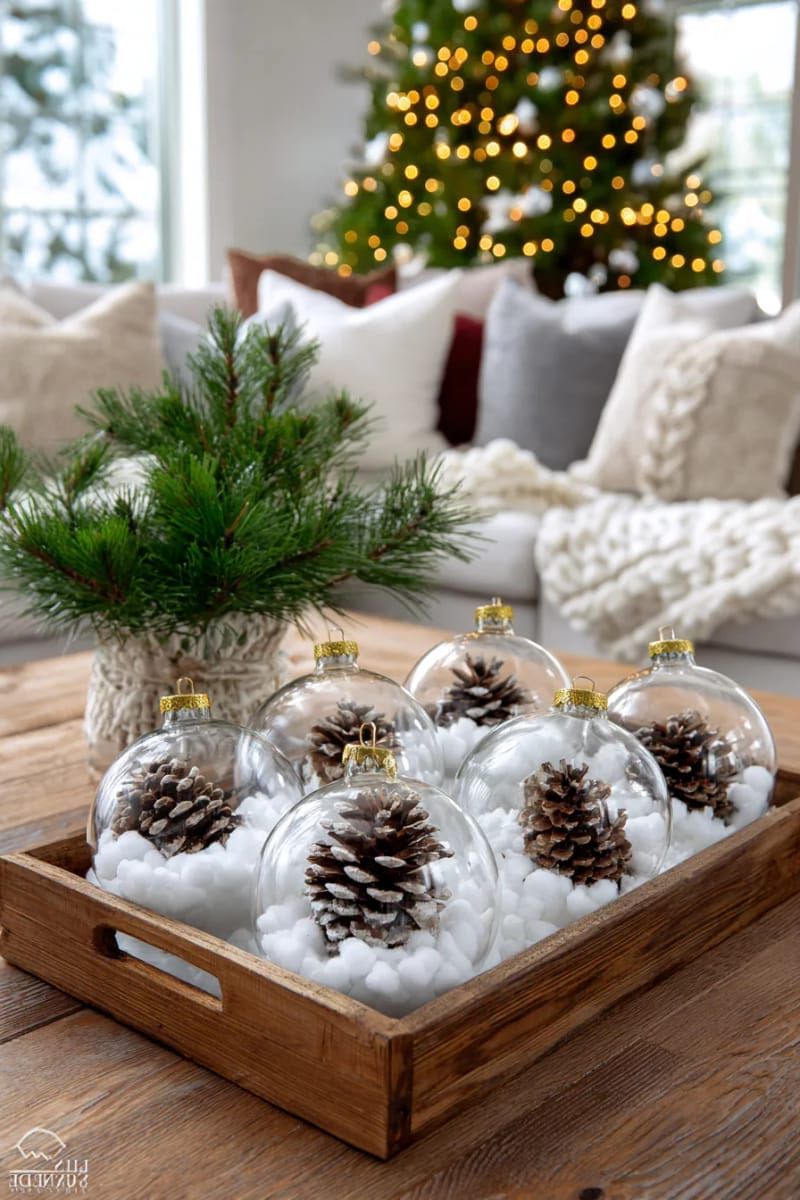
Clear Christmas balls filled with fake snow and little pinecones can make your tree feel wintry and special. They might seem fancy, but you can make them easily in just a few minutes.
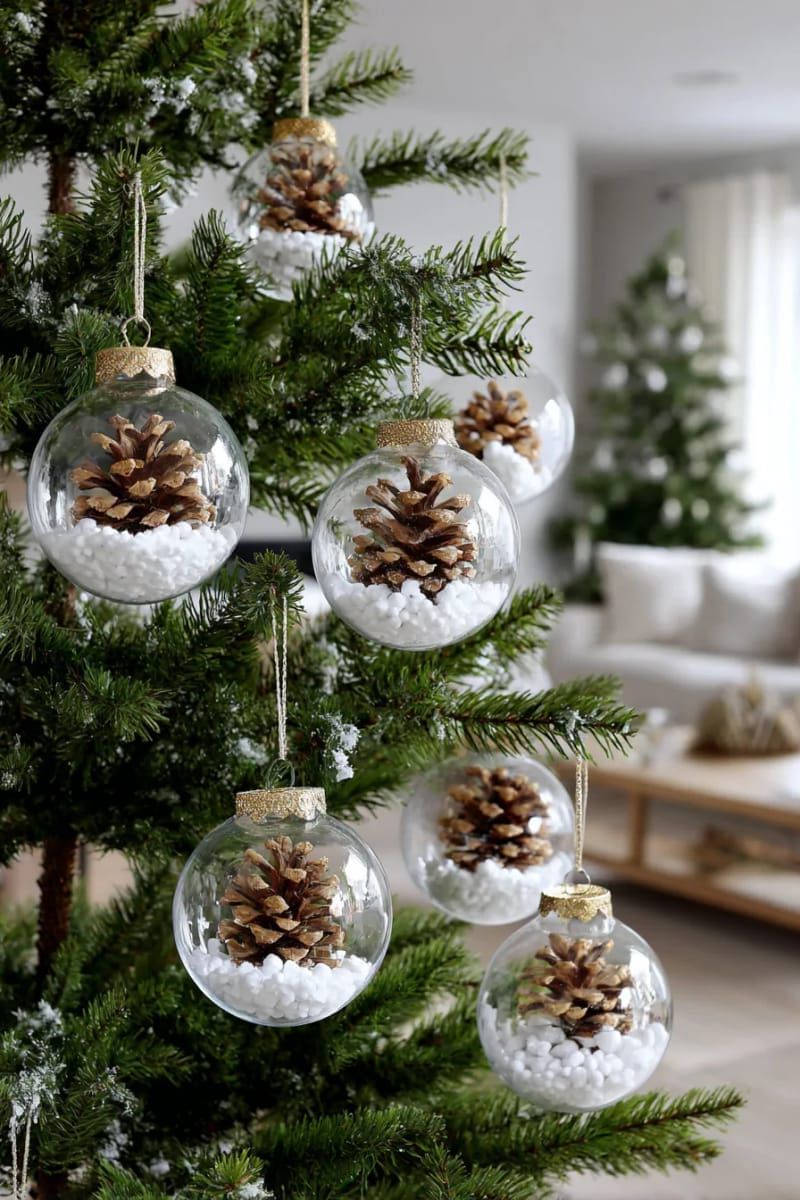
Simply put a little fake snow and some small pinecones into each ball; it’s easy and fun to do.

This craft is perfect for families or anyone who needs to decorate quickly. The end result looks nice, but it’s not too fancy.
One thing to watch out for is that the pinecones might move around. If you want them to stay in place, just use a little glue. But if they shift a bit, it can actually make it look more interesting.
15. Floating Hoop Wreaths with Pine and Bells

Round hoop wreaths bring a fun new look to holiday decorations. You just need a metal hoop, some fake pine, a few berries, and shiny bells.
Place the green bits slightly to the side for a cool look, then hang the bells so they swing. It’s really easy to do.
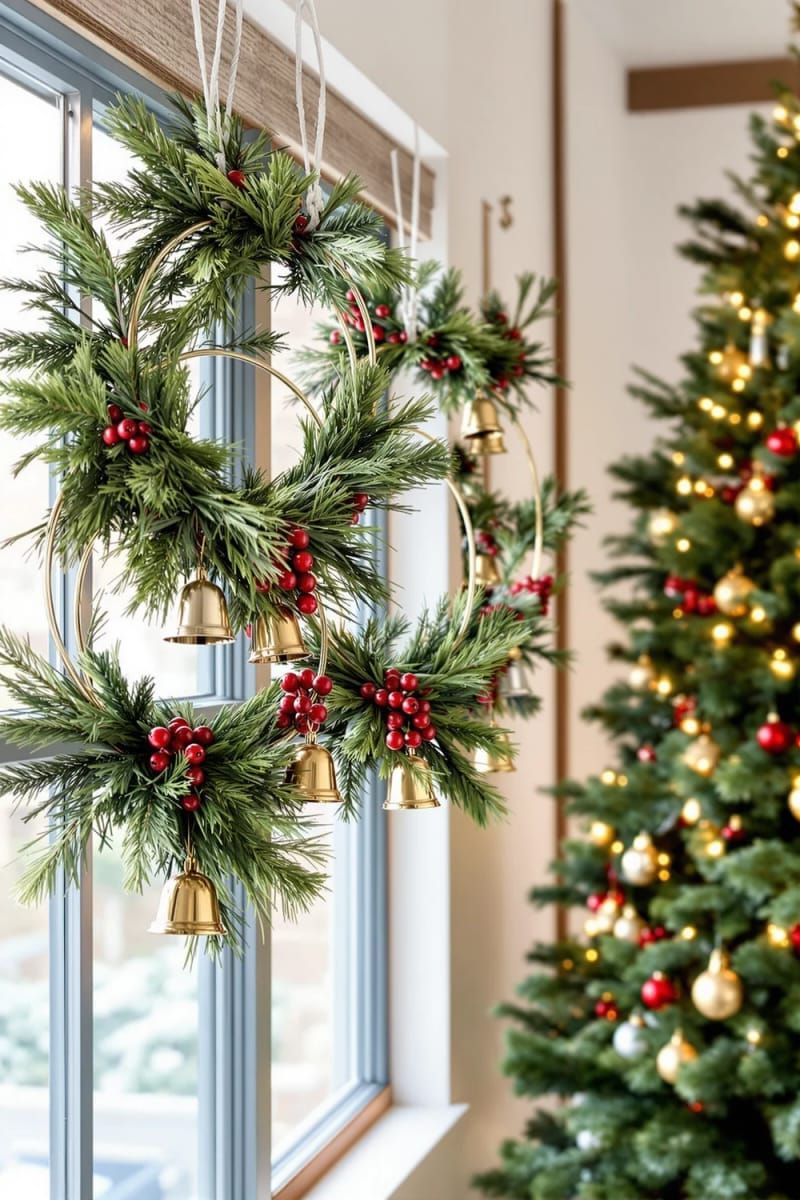
You don’t need to be an expert—just grab some floral wire and scissors. These wreaths look lovely in windows, like they’re magically hanging in the air.
But be careful not to use too many heavy decorations, or your hoop might sag. If you use lighter things, you can make a pretty wreath in less than an hour.
16. Yarn Cone Mini Christmas Trees

Little yarn Christmas trees add a warm, homemade touch to any room. You can make them easily: just wrap green yarn around a paper cone, glue it down, and stick on small buttons or beads as decorations. It’s simple and fun!
Even kids can join in, making this a fun and affordable project for the whole family.
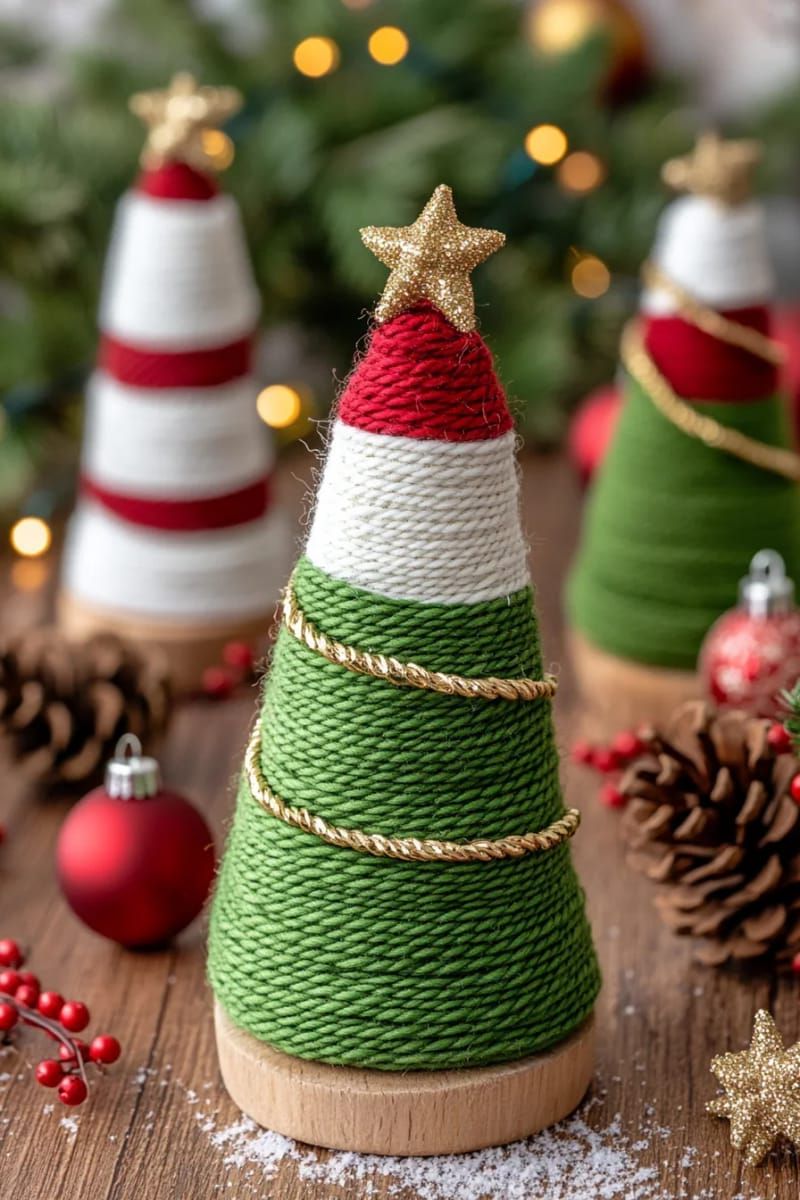
But yarn can be tricky; it might slip or become loose if you hurry. So, slow down and add a little glue here and there to keep everything neat.
Want to make it even cooler? Use different colors or types of yarn. Who says Christmas trees can’t be colorful or shiny?
17. Mitten Garland for Window Frames
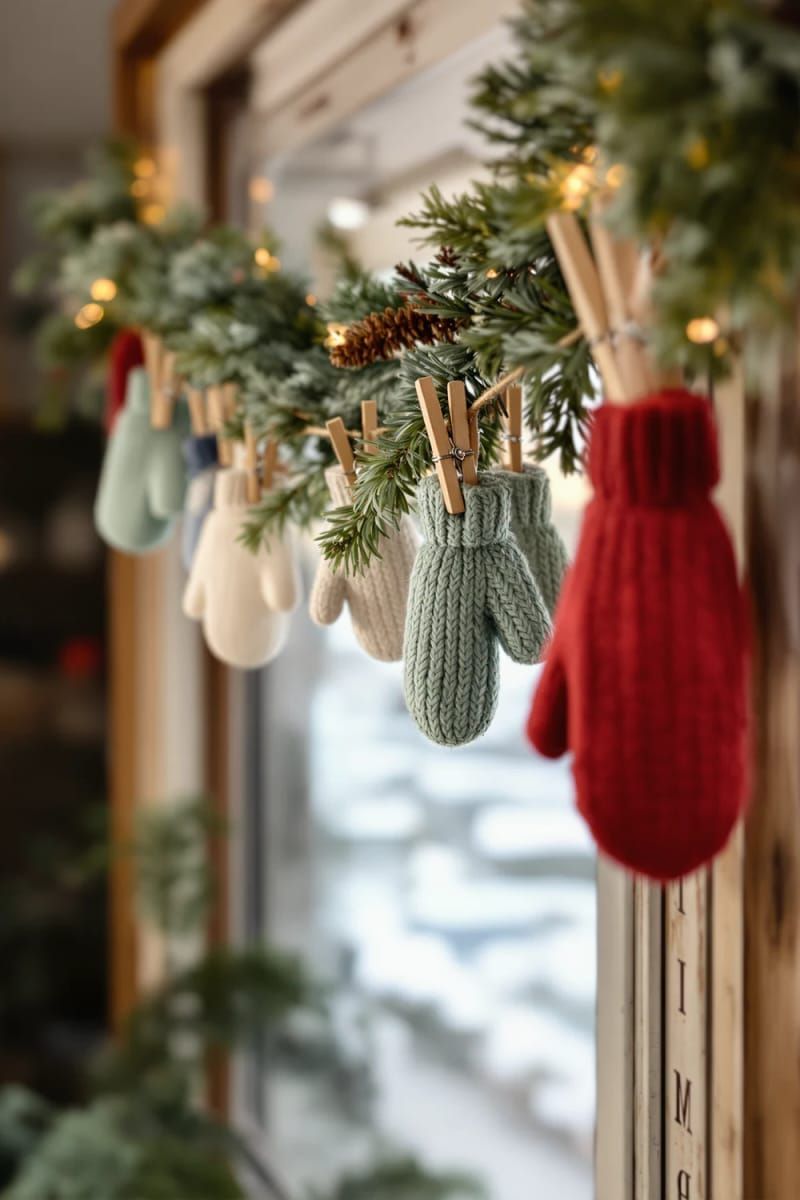
Why settle for plain plastic garlands when you can create a fun string of tiny mittens? Just find some leftover felt, some twine, and a needle, and get started!
Snip, stitch, and dangle your little crafts across a window. It’s easy and cheap, and it makes your space feel warm and inviting for everyone who comes to visit.

Sure, making these tiny mittens takes some time, and you have to be careful not to hurry. But the fun makes it worth it. You can use different colors, add cool designs, or let the kids make their own special ones.
Who would have thought that a line of little mittens could bring so much joy on chilly mornings?
18. Mason Jar Snow Globes with Bottle Brush Trees
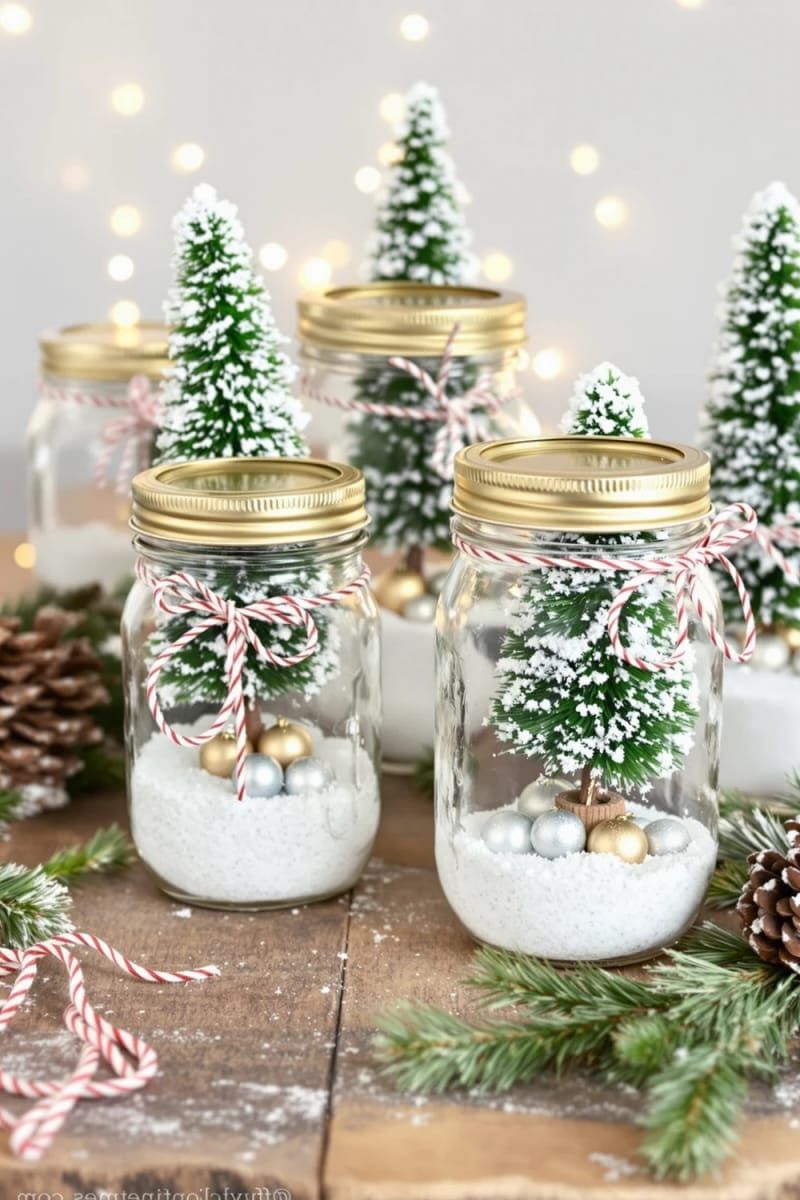
Mason jar snow globes with little trees and sparkly glitter make any holiday decoration feel special and friendly.

Take a jar and put a little glue for your tiny tree to stand, then sprinkle some glitter like snow, and close it up tight. Shake it gently, and you’ve got a winter world that’s easy to make!
These snow globes seem like they belong in a fairy tale, but they can get a little messy. The glitter sticks to everything and making sure the jar is sealed tight is really important to stop any spills. But they don’t cost much and are fun for kids and grown-ups too.
If you want to make it special, you can add tiny toys or colorful sand to give your snow globe some flair.
19. Paper Christmas Village with LED Tea Lights

Take some cardstock or an empty cereal box, scissors, and glue. You can draw easy house shapes or print out templates. Cut windows from parchment paper for a warm look.
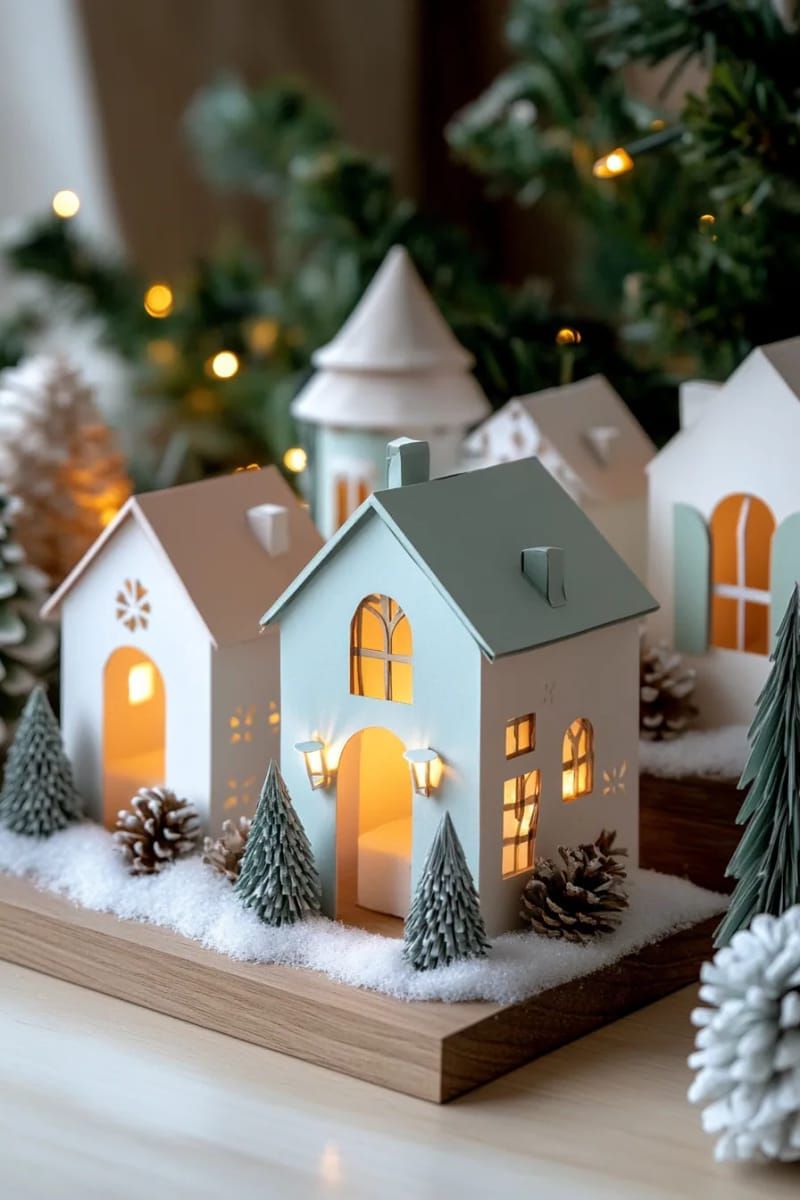
Put a little LED tea light in each house, and watch your paper village shine with a cozy glow.
This project is easy on the wallet and safe for kids because there are no flames. You can use markers or colored paper to make each house special.
One thing to remember is that thin paper can bend easily, so it’s better to use thicker paper if you can. But when you see the warm light shining through those little windows, it’s all worth it.
20. Painted Toilet Paper Roll Snowflakes
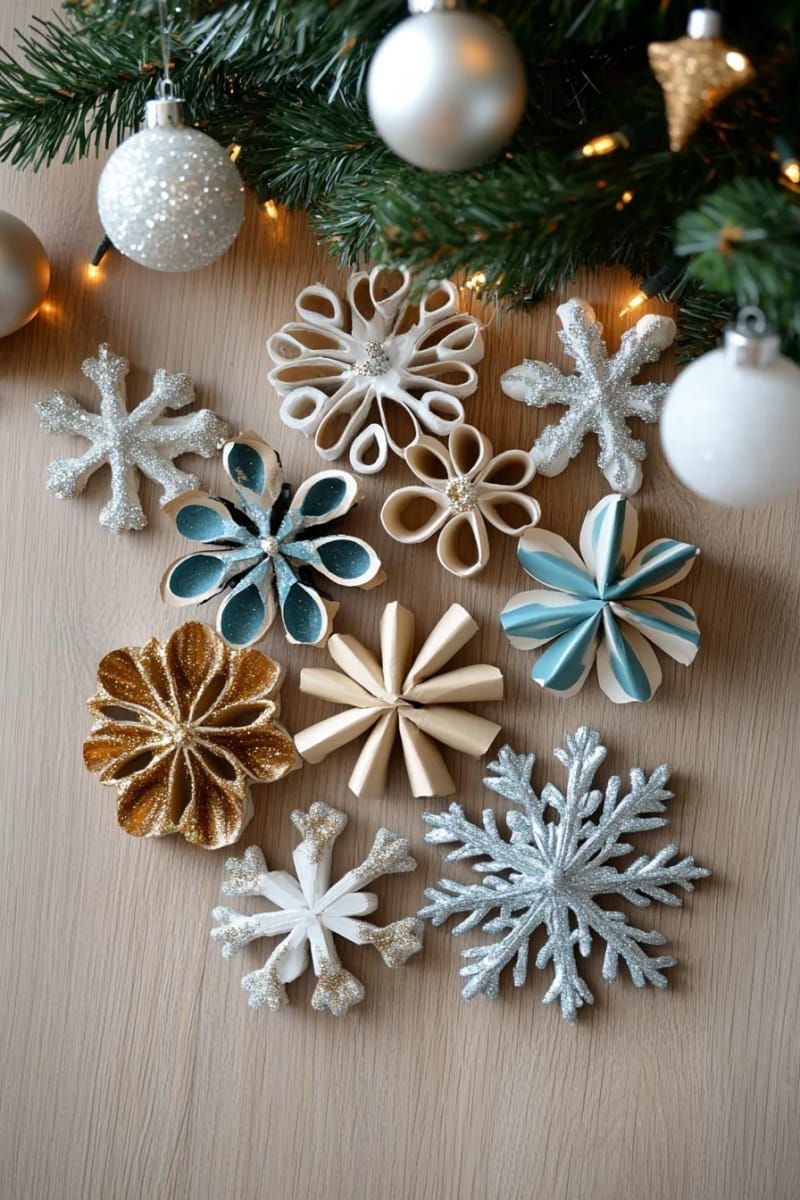
Why throw away those empty toilet paper rolls when you can make bright snowflakes? Just cut, twist, and glue the pieces together to create your own snowy designs.

A quick spray of shiny paint, like silver or gold, makes them sparkle right away. You can hang them up for a fun and cheap winter decoration.
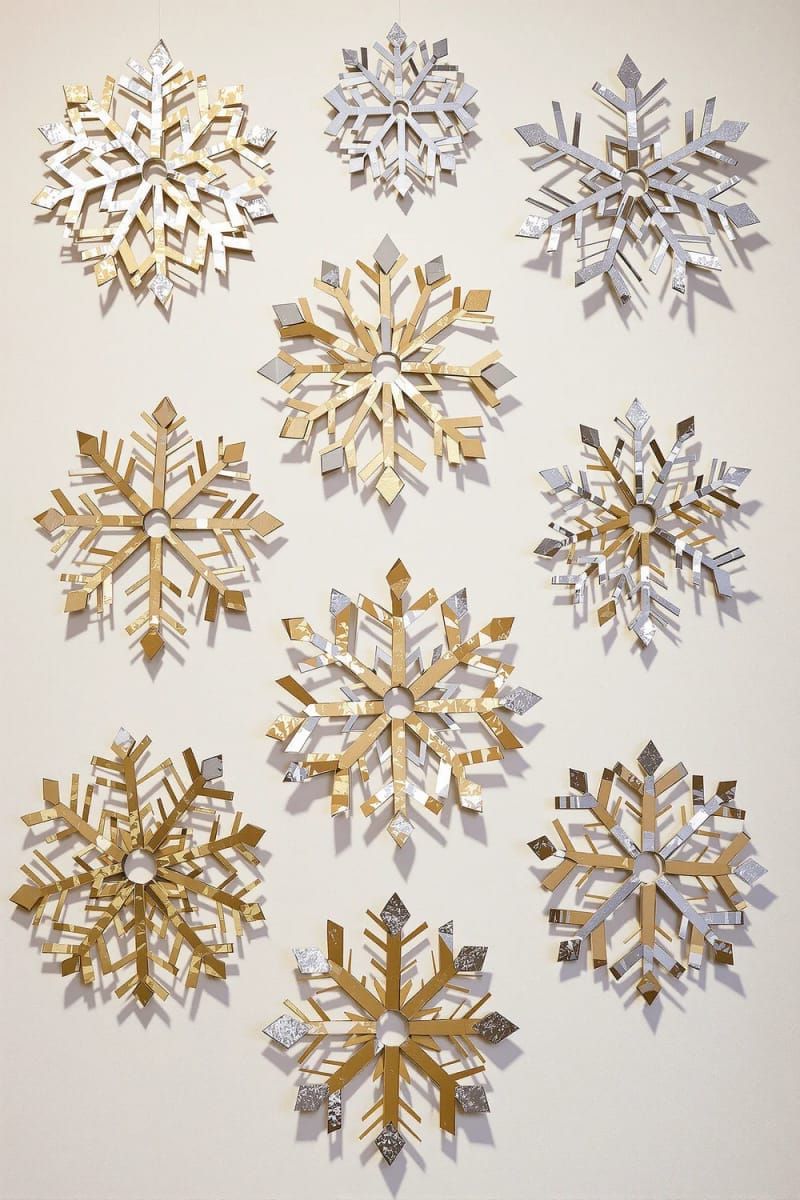
This project is super cheap and easy to do. Just a small heads up: the paint smells a bit, so it’s best to spray it outside or open a window.
The result? Beautiful wall art that looks fancy without costing a lot. If you want to make it more exciting, use different sizes or group snowflakes together for a fun effect.
21. Gold Leaf Twine Cone Trees for Modern Decor

Twine-wrapped cone trees add a cool, cozy touch to your holiday decorations. You just take some cardboard cones, wrap them carefully with jute twine, and then add a little gold leaf for some sparkle.
The mix of the rough twine and shiny gold is something everyone can love. It’s easy to make, doesn’t cost much, and really stands out.
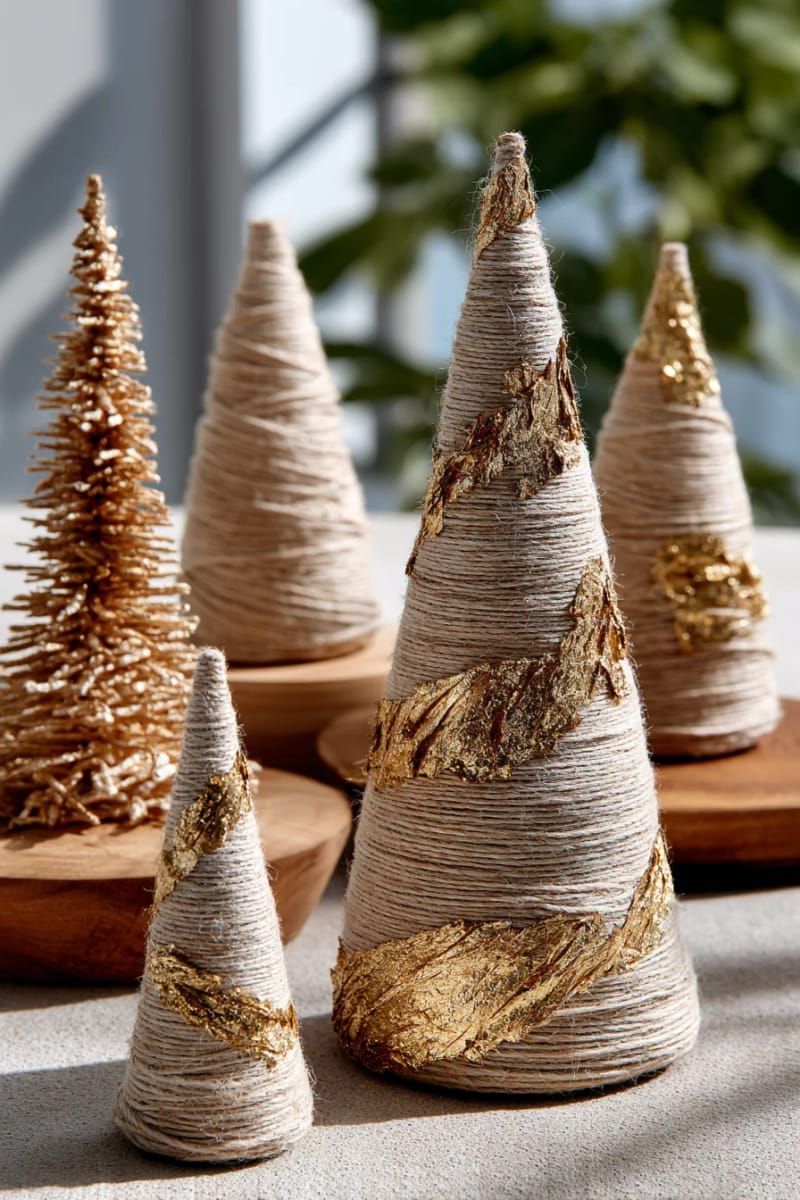
But using gold leaf can be tricky. If you use too much, your trees can look too shiny and silly. If you use too little, you can’t even see it. Just put glue on a small part and gently press the gold leaf on it.
Looking for something to talk about? Put these trees together on a shelf and add some fairy lights. Your friends will wonder if you got them from a fancy store.
22. Vintage Ornament Shadow Box with Velvet Ribbon
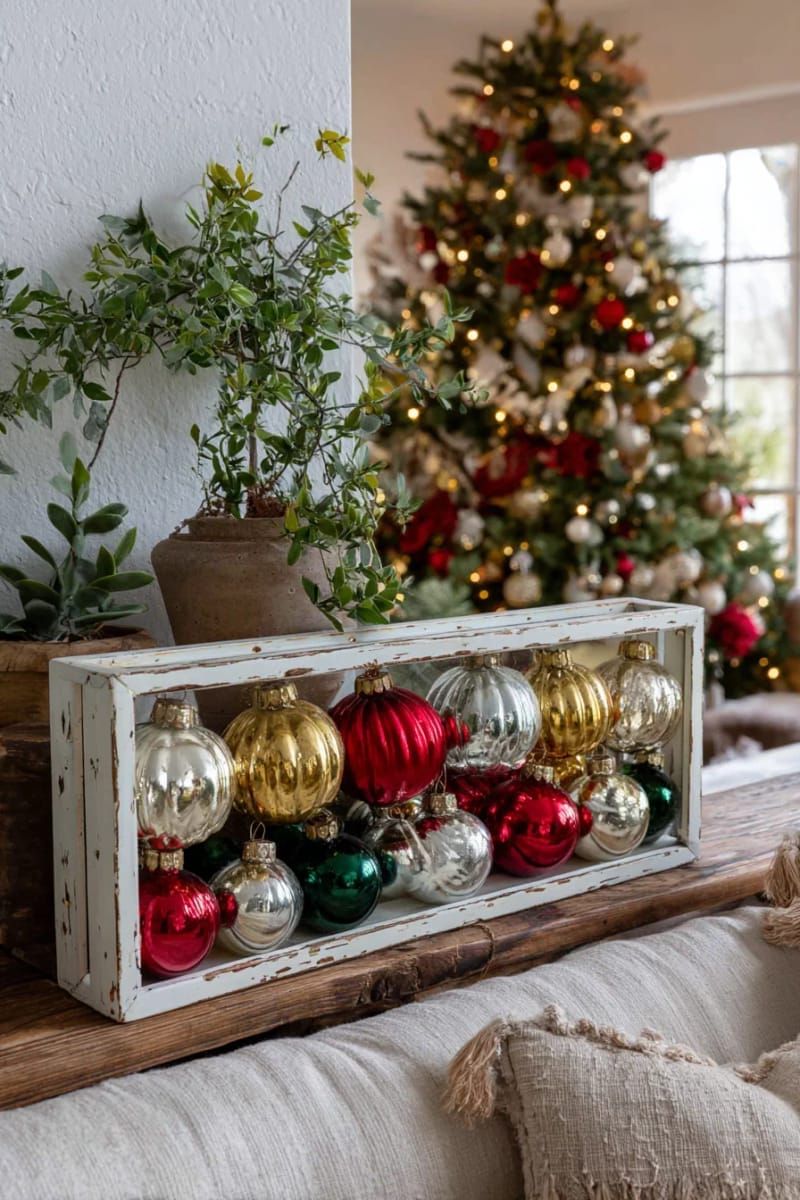
Why have a boring display when you can make a special shadow box? Use old glass ornaments in bright reds, cool blues, or shiny silver to make it fun.
Tie on some soft velvet ribbon to add a different feel. This project turns happy holiday memories into something beautiful for your wall, making everyone smile and remember good times when they see it.

Making a display can be tricky sometimes. Vintage ornaments are delicate, so we have to be very careful with them. To keep each piece safe, use clear fishing line or glue dots before putting the shadow box together.
Change the ribbons with each season or add a special tag in your own handwriting. This makes it personal and festive, standing out more than store-bought decorations.
23. Plastic Cup Bells with Jingle Bell Accents

Why spend money on fancy ornaments when you can make cute bell-shaped decorations from plastic cups? Just take some cups, paint them in fun colors, and put a jingle bell through the bottom. It’s easy and fun!

Kids really enjoy making these decorations. The soft sound of the bells makes the tree feel extra special.
One thing to think about is that plastic cups aren’t great for the planet. You can use cups that break down naturally or save ones from parties. Hang your pretty bells on door handles or branches to show them off.
You don’t need fancy things to make special decorations. All it takes is a bit of creativity and some hard work.
24. Pinecone Snowman Family with Felt Scarves

Sometimes, you can make the best Christmas decorations with things like pinecones. Find some, stick on little white balls for heads, and add tiny scarves made of felt.

Buttons can turn into funny hats, and each snowman will be different. Kids enjoy putting them together, and you don’t have to buy expensive decorations.
These pinecone snowmen bring a fun, cozy feel to your home. You can make them special by using old bits of fabric for scarves or different buttons for their hats.
Sure, hot glue can be a bit sticky, but that’s what makes it fun, and cleaning up is worth it for all the joy of the holidays.
25. Bold Pom-Pom Garland for Mantel or Tree
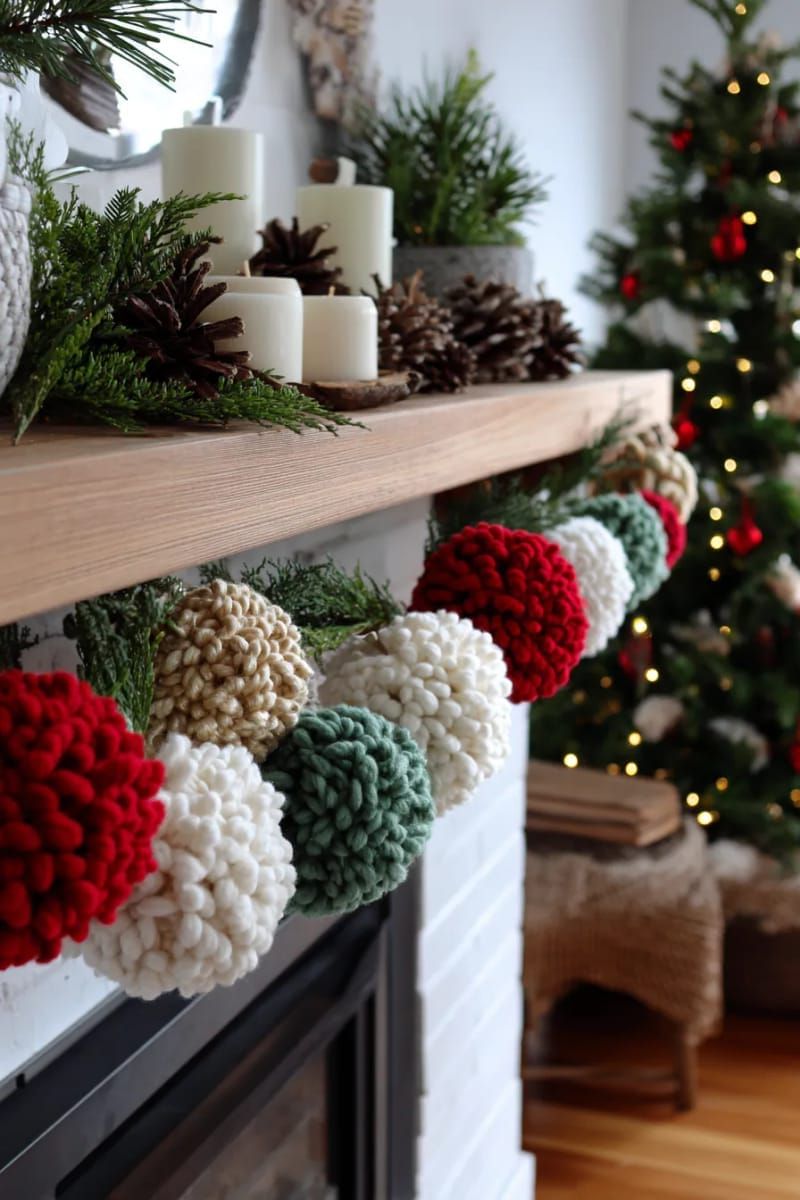
Fluffy yarn pom-pom garlands make your mantel or tree look extra cozy. You just need some thick yarn, scissors, and a little patience to create them.
Wrap the yarn around your fingers, tie it in the center, cut the loops, and then fluff it up. When you put them on a string, you get a happy decoration for the holidays, and you don’t need to be an expert to do it.
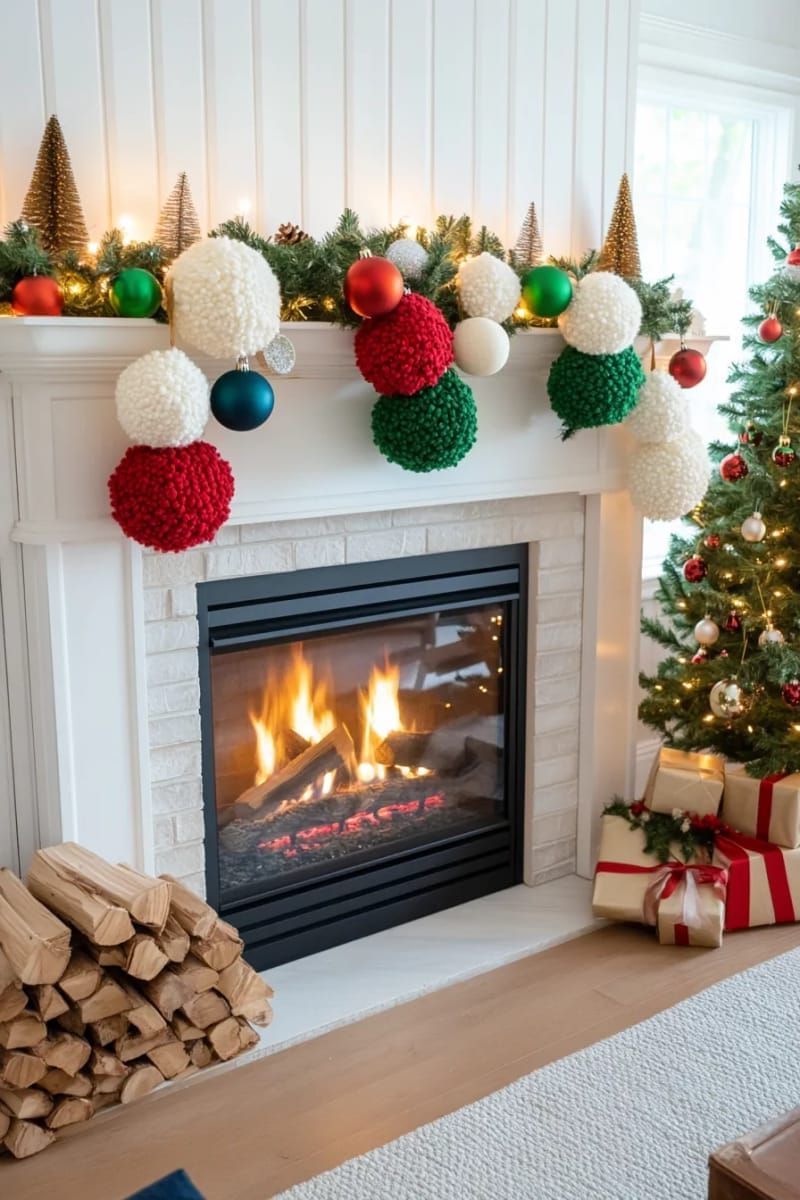
This project is quick and cheap, perfect for anyone who needs to decorate in a hurry. You can choose whatever colors you like or even make different sizes to match your theme. The hardest part? Cleaning up all the little bits of yarn that fall everywhere while you create.
But when you make pom-poms at home, they feel warmer and friendlier than the ones you buy in a store.
26. Boho Wooden Bead and Tassel Ornaments

Wooden bead and tassel ornaments for the tree make your holiday decorations feel relaxed and fun. Their natural colors and silly shapes change things up from the regular red and green we always see.
Take wooden beads and some soft yarn, then use a needle to thread them together. When you’re done, you’ll have pretty ornaments that look fancy but didn’t cost much at all.
These decorations make your tree feel cozy and interesting. You can choose soft colors or bright ones, depending on how you feel. Children can easily tie knots, turning it into a fun family project.
But be careful: those beads can be a danger for little ones, so make sure to keep them up high where tiny hands can’t reach!
27. Painted Wine Glass Snowmen with Mini Scarves

Have you ever thought about making cute snowmen from old wine glasses? You can paint happy faces on the round part, give them some rosy cheeks, and then put a little scarf around the stem.
It’s easy and doesn’t cost much, plus you get to use things you already own. Your table will feel warm and a little magical right away.
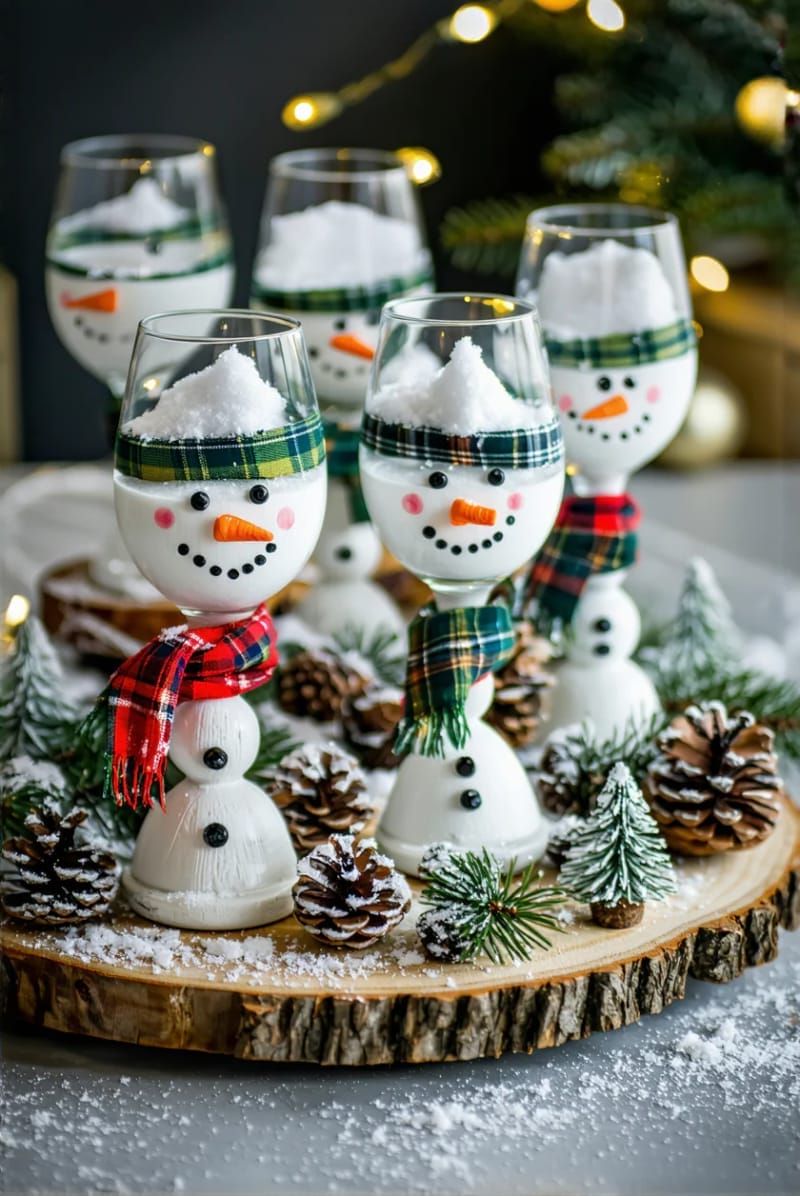
This craft is fun, but glass can be tricky. Use acrylic paint and wait for each layer to dry. Don’t worry if your circles or lines are not perfect; a silly smile can make it special.
Also, kids can help by tying the scarves, turning it into a fun time for everyone in the family.
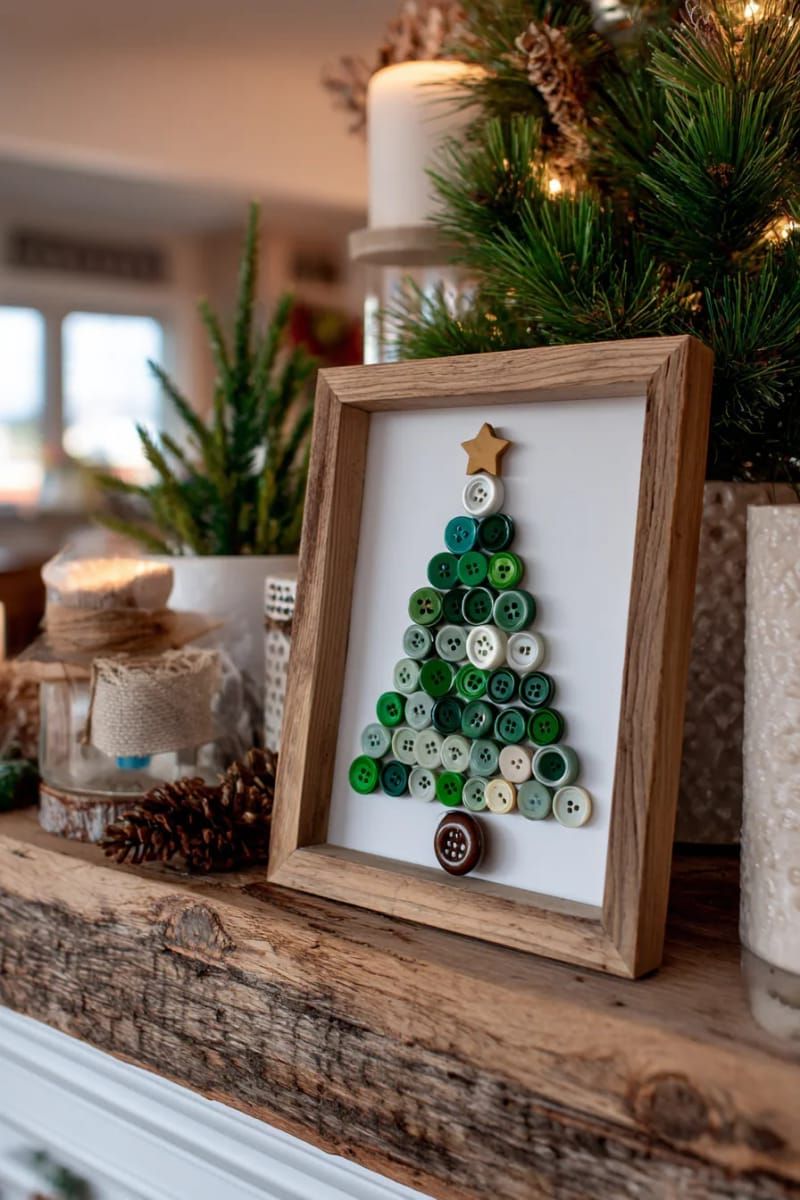
Have you ever thought about making a Christmas tree without all the usual mess? Just find some green buttons in different colors and sizes, some glue, and a little photo frame. It’s a fun way to be creative!
Arrange the buttons to look like a tree, putting the big ones at the bottom. Add a brown button for the trunk and place a star on top to finish it off.
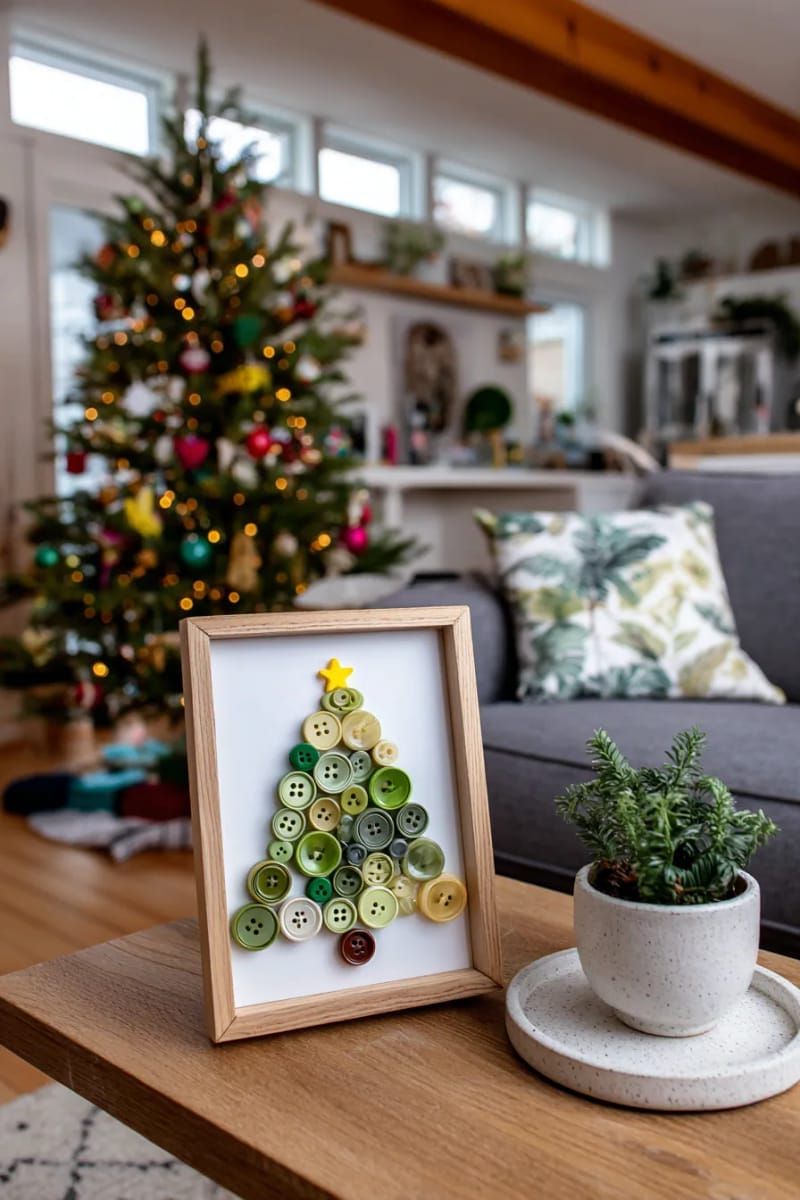
This craft is cheap but full of charm. Kids enjoy finding and stacking the buttons, while grown-ups love the unique touch it adds to the holiday spirit.
The only trick is that hot glue can be a bit messy, so make sure a grown-up helps out. You can hang your special tree on a wall or give it to someone. Each tree will look different, just like you!

Picture making heart ornaments from red felt and shiny beads. It’s easy and fun! The soft felt and bright beads make your tree feel cozy and special.

Even if you’re new to sewing, you can make these heart ornaments easily. Just cut out two hearts from the felt, stitch them together, and then add some shiny beads to make them sparkle.

Kids enjoy getting involved, making it a warm winter activity for families. Hanging these ornaments brings a special, handmade feel to your home. Just remember, it’s important to stitch neatly; any mistakes will be easy to see on the felt.
Don’t worry about making it perfect; little mistakes add character to each heart. After all, who wouldn’t love a special ornament made with love?
30. Pine Branch Centerpiece with Candles and Cranberries

Why buy decorations when you can use things from your own yard? Just gather some pine branches, a few white candles, and toss in some cranberries. You can make a pretty and special centerpiece for your table with these easy items.
The smell of fresh pine can make your friends want to stay at the table for a while longer.
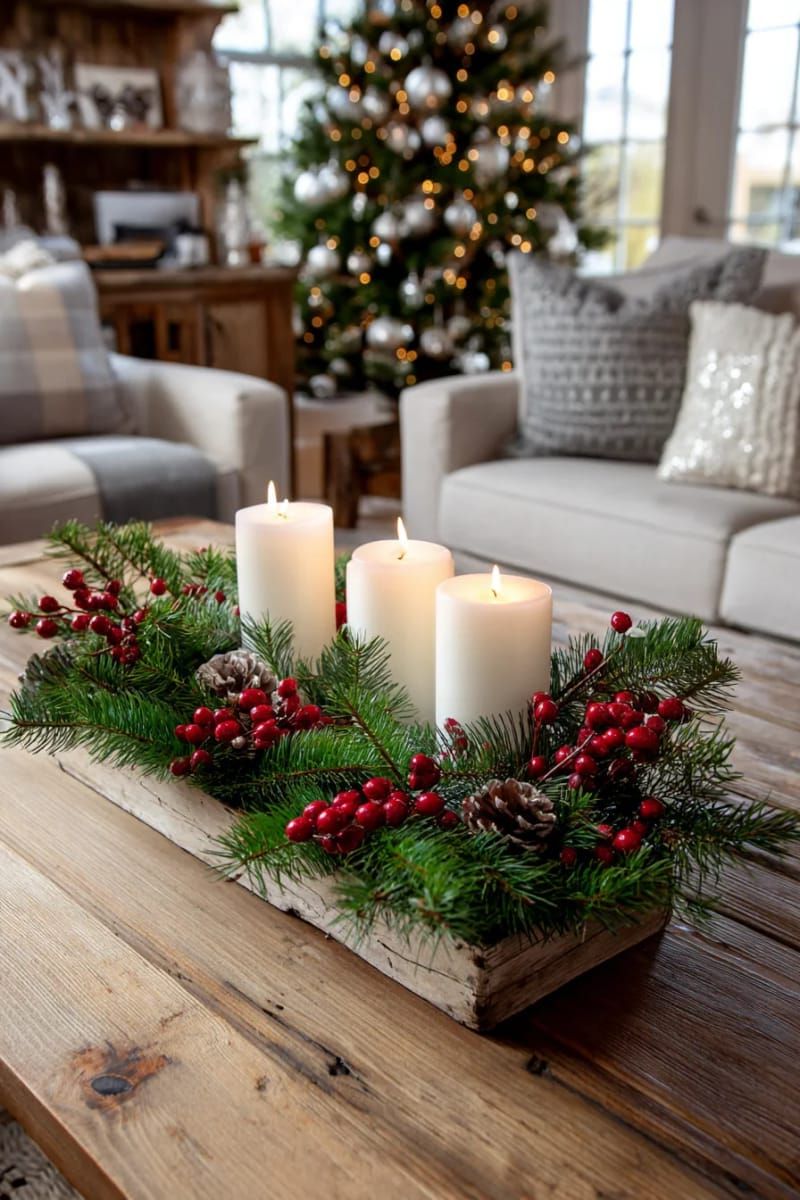
Collect some pine branches and place them around some candles. Add a few cranberries for a bright touch. It’ll make a cozy look for your table.
You don’t need fancy things or special skills, just your imagination and a good way to put things together. It’s cheap and good for the earth, but be careful of sticky sap and keep candles away from the little pine needles.
31. Cinnamon Stick Twine Starburst Decoration

Cinnamon sticks tied with twine create a fun and simple decoration. It looks nice and adds a warm touch to any space.
Arrange five or six sticks to form a star shape, and tie them together at the points with twine. It’s easy, and the lovely smell will make everything feel cozy and festive, without any artificial scents needed.
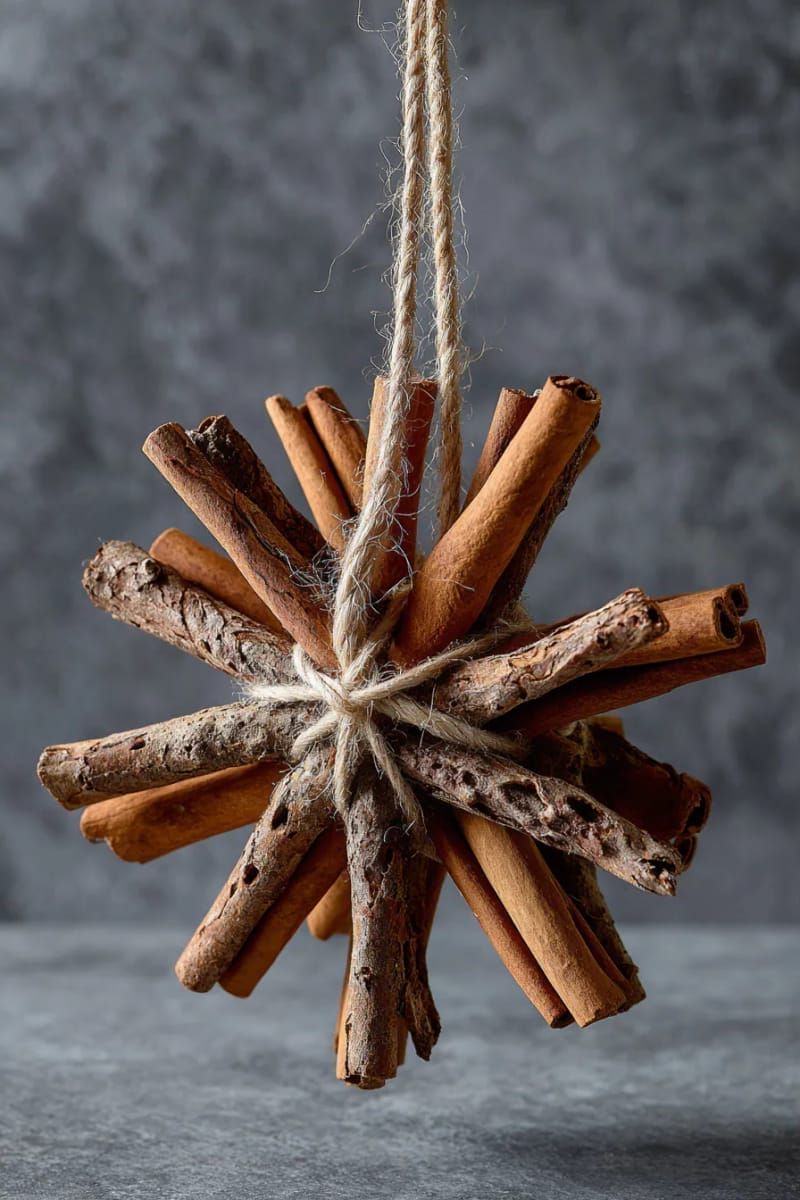
This craft is easy and quick, which is great if you’re not waiting around. Just be careful because cinnamon sticks can break easily if you’re not gentle.
Hang your starburst in a window or over the table. People will smell the nice, warm scent and might even ask how you made it.
Wrapping Up the List
Are you excited? With these 31 fun DIY Christmas decorations, you can make your home shine and have a great time without spending too much money.
Who would have thought that things like cardboard, felt, or even toilet paper rolls could become beautiful decorations if you just use your imagination a little?
Are you ready to get creative? Choose a couple of fun ideas to make this week. You can ask your friends or family to join you for a nice night of crafting together.
Don’t forget, the best decorations are made when you’re laughing, getting sticky with glue, and telling stories with your friends and family as you create.